Overview
Storage Transfer Service enables users to quickly and securely transfer data to, from, and between object and file storage systems, including Google’s Cloud Storage, Amazon S3, Azure Blob Storage, and on-premises data.
This blog walks you through the process of transferring data from AWS S3 to Google’s Cloud Storage in a secure manner using identity federation.
Identity Federation creates a trust relationship between Google Cloud and AWS. It allows you to access resources directly, using a short-lived access token, and eliminates the maintenance and security burden associated with long-term credentials such as the service account keys. Using Identity federation, you do not have to worry about rotating keys or explicitly revoking the keys when Storage Transfer Service is not in use.
Steps to configure storage transfer job to transfer data from AWS S3 to GCS
This section walks you through the process to set up infrastructure to transfer data from Amazon Web Services to Google Cloud securely.
Configurations on Google Cloud
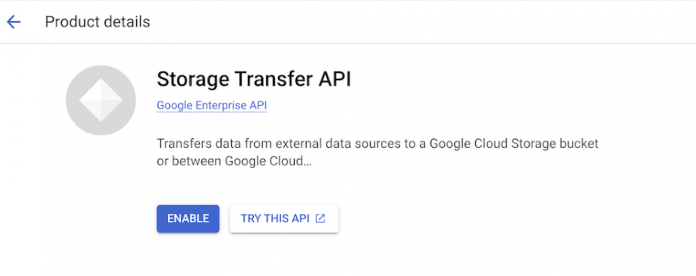
Enable the Storage Transfer API under APIs and Services.
Open Cloud Shell in the Google Cloud project that you want to configure the transfer job in
Run gcloud auth print-access-token to generate the Authorization: Bearer token which will be used in the next step
Run the following command in the cloud shell to generate the service account:
Replace project number, project ID and token.
The output of this command will be in the format:
NOTE: Make a note of the subjectId as this will be used in the AWS IAM role trust relationship policy.
Create a Cloud Storage bucket in Google Cloud
Give the service account “accountEmail” that you generated in the previous step the following IAM permissions:
Storage Object Viewer
Configurations on Amazon Web Services
In the AWS IAM console, create an IAM policy with the following:
NOTE: This policy can be further restricted to a single S3 bucket. s3:GetBucketLocation permission will be needed to fetch the object location.
After the policy is created, head to IAM roles tab and follow the steps below:
Select Create role
Select Web Identity
Select “Google” as the identity provider with audience as “accounts.google.com”
In the next step, to add permissions, Select the IAM policy that you created in step 1
Update the role name and Create the role
In the IAM Role console, Select the role you created and Click on the Trust relationships tab
Click Edit Trust Policy, update the following and update the policy:
Create an S3 bucket on AWS with objects to be transferred to Google Cloud
Storage transfer job configuration
Head to the Storage Transfer Service (STS) on the Google Cloud project
Select Create a transfer job
Source – Amazon S3, Destination – Google’s Cloud Storage
In the next step, enter the S3 bucket name and AWS IAM role ARN
Next, select the Cloud Storage bucket
Next, choose the settings that works best for your use case
Select the schedule and create the STS job.
Notice that the objects from the S3 bucket are being copied over to the GCS bucket. When you run it again, Storage Transfer Service does incremental transfers, skipping the data that was already copied.
Custom scheduler for Storage Transfer Service
STS currently supports a minimum sync schedule of 1 hour. Triggering a Cloud scheduler via Cloud Functions is a work around technique to reduce the sync schedule to minutes/custom schedule.
Event-driven STS for Cloud Storage
Storage Transfer Service now offers event-driven transfer, a serverless and easy-to-use replication service. STS can listen to event notifications in AWS or Google Cloud to automatically transfer data that has been added or updated in the source location. Event-driven transfers are supported from AWS S3 or Cloud Storage to Cloud Storage.
This feature is a good fit for use cases where you have a changing data source (e.g., new object insertion) that needs to be replicated to the destination in a matter of minutes.
You can trigger an event driven replication from AWS S3 to Google Cloud for ongoing data analytics and/or machine learning.
Event driven configuration on Storage Transfer Service:
The image below indicates a new file being transferred from AWS S3 to Cloud Storage via event driven STS:
Enabling AWS Event Notifications for SQS
On AWS S3:
Go to the bucket “Properties” tab and create “Event Notification”
Select All Object Create Events
Update the SQS ARN
Add SQS and S3 permissions to the IAM role being configured in the Storage Transfer Job
Once the setup is complete, the S3 bucket should be enabled to deliver notifications to the configured SQS queue. And the configured role should be able to access both SQS queue and S3 bucket for event-driven transfers.
On AWS SQS:
Create SQS queue for event driven transfers
In Access Policy, select “Advance” and add the sample policy below. This grants Amazon S3 permissions to publish messages to the SQS queue.
Note: Replace SQS ARN, Source account number and S3 bucket ARN
Make a note of the SQS ARN to configure it in the Storage Transfer Service Event Driven tab.
Create a Storage transfer job and observe your objects being replicated from AWS S3 to GCS bucket.
This completes the event driven set up for Storage Transfer Service.
Summary
In this blog, we used Storage Transfer Service to securely transfer data from AWS S3 to Google’s Cloud Storage. We also discussed the event-driven STS feature that can listen to event notifications in AWS to automatically transfer data that has been added or updated in the source location.
If you would like to learn more, check out the Storage Transfer Service documentation.
Cloud BlogRead More


