

This post explains how you can add value and info boxes in shiny and Rmarkdown. Value and Info Boxes are very popular to display insights in colorful boxes, they are available in shinydashboard package but not in shiny and Rmarkdown. There are many times when you don’t want to use shinydashboard template but want to include value and info boxes to make your shiny app visually appealing.
I am glad to release R package named summaryBox for this. You can install it from github. It is not available in CRAN yet.
remotes::install_github(“deepanshu88/summaryBox”)
This is a basic example for demonstration purpose. This package is based on Bootstrap 4 so it’s important you enable Bootstrap 4 in shiny using bslib library as shiny by default uses Bootstrap 3. Latest version of Shiny (1.6) started supporting Bootstrap 4 so it does not work with prior versions of shiny (
library(shiny)
library(summaryBox)
# Bootstrap 4
theme
# UI
ui
theme = theme,
br(),
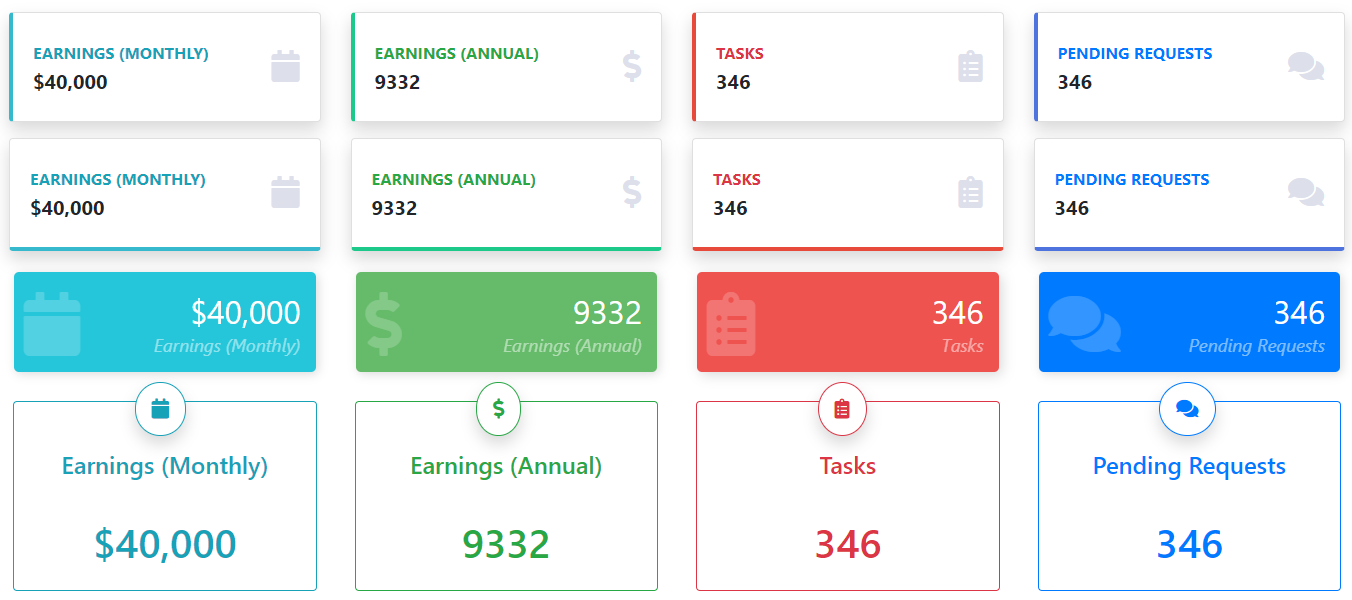
fluidRow(
summaryBox(“Earnings (Monthly)”, “$40,000”, width = 3, icon = “fas fa-calendar”, style = “info”),
summaryBox(“Earnings (Annual)”, “9332”, width = 3, icon = “fas fa-dollar-sign”, style = “success”),
summaryBox(“Tasks”, “346”, width = 3, icon = “fas fa-clipboard-list”, style = “danger”),
summaryBox(“Pending Requests”, “346”, width = 3, icon = “fas fa-comments”, style = “primary”)
),
fluidRow(
summaryBox(“Earnings (Monthly)”, “$40,000”, width = 3, icon = “fas fa-calendar”, style = “info”, border = “bottom”),
summaryBox(“Earnings (Annual)”, “9332”, width = 3, icon = “fas fa-dollar-sign”, style = “success”, border = “bottom”),
summaryBox(“Tasks”, “346”, width = 3, icon = “fas fa-clipboard-list”, style = “danger”, border = “bottom”),
summaryBox(“Pending Requests”, “346”, width = 3, icon = “fas fa-comments”, style = “primary”, border = “bottom”)
),
fluidRow(
summaryBox2(“Earnings (Monthly)”, “$40,000”, width = 3, icon = “fas fa-calendar”, style = “info”),
summaryBox2(“Earnings (Annual)”, “9332”, width = 3, icon = “fas fa-dollar-sign”, style = “success”),
summaryBox2(“Tasks”, “346”, width = 3, icon = “fas fa-clipboard-list”, style = “danger”),
summaryBox2(“Pending Requests”, “346”, width = 3, icon = “fas fa-comments”, style = “primary”)
),
br(),
# Info Box
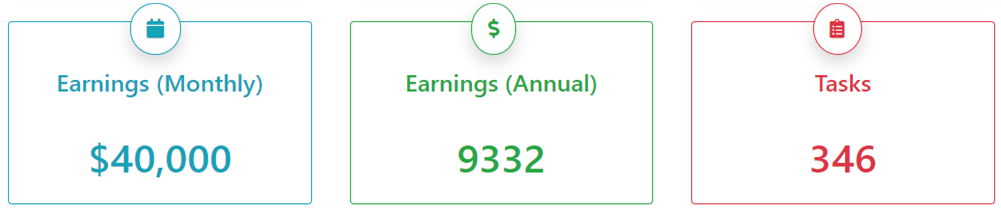
fluidRow(
summaryBox3(“Earnings (Monthly)”, “$40,000”, width = 3, icon = “fas fa-calendar”, style = “info”),
summaryBox3(“Earnings (Annual)”, “9332”, width = 3, icon = “fas fa-dollar-sign”, style = “success”),
summaryBox3(“Tasks”, “346”, width = 3, icon = “fas fa-clipboard-list”, style = “danger”),
summaryBox3(“Pending Requests”, “346”, width = 3, icon = “fas fa-comments”, style = “primary”)
)
)
# Server
server
}
# Run App
shinyApp(ui = ui, server = server)
In this package, there are 3 functions for value and info boxes. summaryBox( )summaryBox2( )summaryBox3( )
summaryBox3( )
Syntax of summaryBox( ) along with its variable definition is as follows.
summaryBox(
title,
value,
width = 4,
icon = “fas fa-chart-bar”,
style = “info”,
border = “left”
)
Arguments
title Text to be shown in the box
value Value to be shown in the box
width Width of Box. width = 4 means 3 boxes can be fitted (12 / 4)
icon Font Awesome 5 icons. E.g. “fas fa-chart-bar”
style Either “primary”, “secondary”, “info”, “success”, “danger”, “warning”
border Either “left”, “bottom”
summaryBox2( ) function also supports “light” and “dark” styles in addition to these styles “primary”, “secondary”, “info”, “success”, “danger”, “warning”
You can use renderUI( ) for communicating it with reactives which makes it dynamic. See the example below.
library(shiny)
library(summaryBox)
# Bootstrap 4
theme
# UI
ui
theme = theme,
br(),
uiOutput(“summarybox”)
)
# Server
server
output$summarybox
fluidRow(
summaryBox(“Earnings (Monthly)”, “$40,000”, width = 3, icon = “fas fa-calendar”, style = “info”),
summaryBox(“Earnings (Annual)”, “9332”, width = 3, icon = “fas fa-dollar-sign”, style = “success”),
summaryBox(“Tasks”, “346”, width = 3, icon = “fas fa-clipboard-list”, style = “danger”),
summaryBox(“Pending Requests”, “346”, width = 3, icon = “fas fa-comments”, style = “primary”)
)
})
}
# Run App
shinyApp(ui = ui, server = server)
As stated before it works with Bootstrap 4 only so you need to specify it in Rmarkdown. This option is available only in version 2.7 or higher.
—
title: “Summary Box”
output:
html_document:
theme:
version: 4
—
“`{r setup, include=FALSE}
knitr::opts_chunk$set(echo = TRUE)
library(summaryBox)
“`
“`{r box}
summaryBox(“Earnings (Monthly)”, “$40,000”, width = 3, icon = “fas fa-calendar”, style = “info”)
“`
Read MoreListenData