Ethereum is a popular public blockchain that makes it possible to create unstoppable applications in a permissionless fashion. It’s available to every user that has an Ethereum account. These Ethereum accounts consist of a private and an associated public key.
The main challenge as a user participating in a public blockchain such as Ethereum is safely managing the blockchain credentials.
Because an externally owned Ethereum account is required to approve transactions, including funds transfers and other sensitive operations, its key material must be carefully safeguarded.
In some fully decentralized applications, the user is expected to manage their own key material. There are other applications, however, where it may be desirable to entrust the management of key material to an external process or service, such as when the key material is frequently needed even when the user isn’t available. This is a common requirement for token staking and other modern blockchain applications.
This post series explains how to create a solution using AWS Key Management Service (AWS KMS). In this first post, we cover the following aspects:
Develop and build cloud infrastructure templates using the AWS Cloud Development Kit (AWS CDK) and Python
Bundle and deploy the AWS CDK-based AWS Lambda functions using Docker
Configure and provision a new AWS KMS-based Ethereum account using a customer master key (CMK)
The second post focuses on the inner workings of Ethereum and how to use the created CMK instance as a secure Ethereum key management service.
Solution overview
The following diagram illustrates our solution architecture.
The scope of the provided solution in the AWS CDK repository is limited to the area within the dotted red line.
Prerequisites
For this walkthrough, you must have the following prerequisites:
An AWS account
An AWS Identity and Access Management (IAM) user with administrator access
Configured AWS credentials
Docker, Node.js, Python 3, and pip installed on the workstation that you plan to deploy the solution from
Deploy the solution with the AWS CDK
The AWS CDK is an open-source framework for defining and provisioning cloud application resources. It uses common programming languages such as JavaScript, C#, and Python.
The AWS CDK command line interface (CLI) allows you to interact with AWS CDK applications. It provides features like synthesizing AWS CloudFormation templates, confirming the security changes, and deploying applications.
This section shows how to prepare the environment for running the AWS CDK and the sample code.
When working with Python, it’s good practice to use venv to create project-specific virtual environments. The use of venv also reflects AWS CDK standard behavior. You can find out more in the workshop Activating the virtualenv.
To install the sample application, complete the following steps:
Install the AWS CDK and test the AWS CDK CLI:
Download the code from the GitHub repo and change into the new directory:
git clone https://github.com/aws-samples/aws-kms-ethereum-accounts.git && cd aws-kms-ethereum-accounts
Download the lambci/lambda:build-python3.8 Docker container:
docker pull lambci/lambda:build-python3.8
Install the dependencies using the Python package manager:
pip install -r requirements.txt
Deploy the sample code with the AWS CDK CLI:
cdk deploy
AWS CDK asks for an additional confirmation to deploy the solution, as shown in the following screenshot.
Enter y to confirm.
This deploys the derived CloudFormation template to the AWS account you have specified. You can see additional details about the deployment process and the stack (configuration and resources) by navigating to the AWS CloudFormation console and choosing the aws-kms-lambda-ethereum stack.
After the deployment is complete, the terminal shows us the CloudFormation stack ARN as well as the CMK KeyID.
Sign an Ethereum transaction with a CMK
To create and sign an Ethereum transaction that can be published to the Ethereum network, you need an account that is sufficiently funded. To fund an account on an Ethereum testnet like Rinkeby, you can use the Rinkeby faucet.
To determine the CMK-based Ethereum address, you first need to run a Lambda function that returns the public Ethereum address of the CMK-based account.
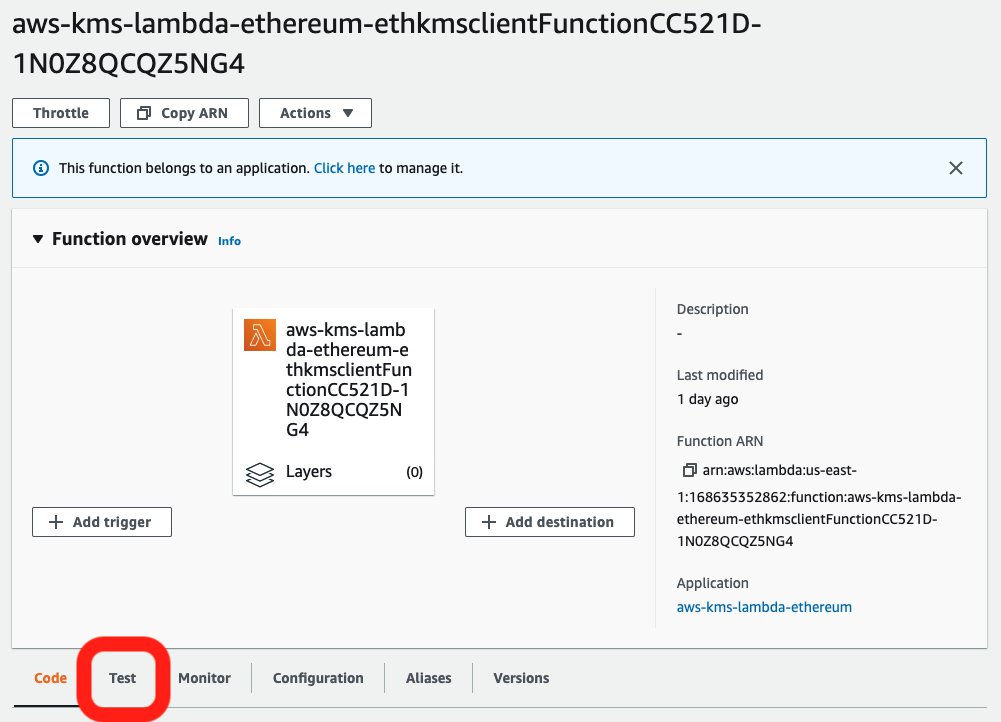
On the Lambda console, choose the newly created aws-kms-lambda-ethereum-ethkmsclientFunction Lambda function.
The random suffix attached to the Lambda function is related to how the AWS CDK names and identifies the resources.
After you choose the function, choose the Test tab.
Use the following JSON snippet as the request for your new test event:
{
“operation”: “status”
}
Choose Test.
A successful run of the test event calculates the matching Ethereum address for the CMK public key and returns it as the checksum enabled address (eth_checksum_address) as shown in the following screenshot.
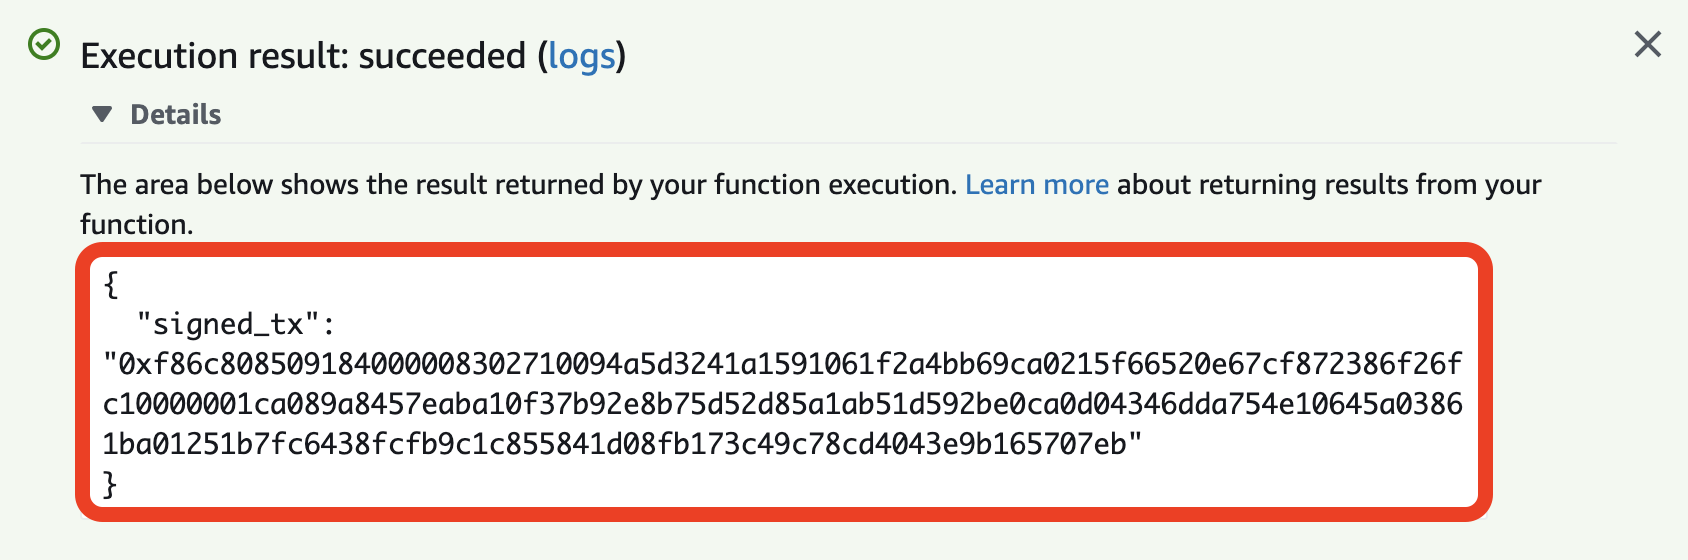
To create and sign an Ethereum transaction with the given CMK-based address, run a Lambda function using the following JSON snippet:
{
“operation”: “sign”,
“amount”: 0.01,
“dst_address”: “0xa5D3241A1591061F2a4bB69CA0215F66520E67cf”,
“nonce”: 0
}
In the preceding JSON snippet, Amount specifies the amount of ether to send, dst_address specifies the Ethereum destination address, and nonce specifies the current number of transactions on the sending address.
Because the AWS KMS-based address has never been used, the nonce value must be 0 for the first transaction.
Choose Test.
If the correct parameters have been provided, the sign operation returns the signed transaction as a hex string wrapped in a JSON object.
Congratulations! You have created your first AWS KMS CMK-backed Ethereum transaction.
To send off the transaction via an Amazon Managed Blockchain Ethereum node, follow the instructions in Deploying an Ethereum Node on Amazon Managed Blockchain. The newly created Lambda function from the referenced blog authenticates with your dedicated Amazon Managed Blockchain Ethereum node using Signature Version 4 authentication. You have to provide the hex encoded Ethereum transaction as an input parameter to the Ethereum client Lambda function as shown in the following Node.JS example below.
web3.eth.sendSignedTransaction(serializedTx);
What is happening under the hood?
The CMK source code repository cloned to your local workstation contains two files that define the CloudFormation template, which defines the AWS Cloud infrastructure as shown in our solution architecture.
The app.py file defines the stack name, which is specified as aws-kms-lambda-ethereum. Furthermore, this file imports the stack definition from aws_kms_lambda_ethereum.aws_kms_lambda_ethereum_stack, which is located in the aws-kms-ethereum-accounts folder.
During the cdk deploy or cdk synthesize step, this high-level construct is translated into a CloudFormation statement.
The high-level API available in Python allows you to specify the expected type, default values, or a regular expression that is required to be matched.
To add additional modules, list them in the setup.py file in the repository root folder.
install_requires=[
“aws-cdk.core=={}”.format(CDK_VERSION),
“aws-cdk.aws-lambda=={}”.format(CDK_VERSION),
“aws-cdk.aws-kms=={}”.format(CDK_VERSION)
],
These modules are installed during the pip install step mentioned earlier.
In the stack definition file, you can now import these modules in the standard Python way:
from aws_cdk import (core,
aws_lambda,
aws_kms
)
Now that the aws_kms module is available, you can use it to define your Ethereum CMK instance:
cmk = aws_kms.Key(self, “eth-cmk-identity”,
removal_policy=core.RemovalPolicy.DESTROY)
cfn_cmk = cmk.node.default_child
cfn_cmk.key_spec = ‘ECC_SECG_P256K1’
cfn_cmk.key_usage = ‘SIGN_VERIFY’
There are two things that have to be explained in detail regarding the shown CMK instance definition.
First, CMK instances per default are created with a RETAIN policy. That means these instances aren’t deleted when the CloudFormation stack is being deleted. This is important because you probably don’t want to lose the key (or in our case, the Ethereum account), particularly after funds have been sent to this address.
In this example, the removal_policy has explicitly been set to DESTROY, so that the CMK resource is deleted automatically with the CloudFormation stack of this solution, to prevent future charges. If the created CMK resource and associated Ethereum account should not be deleted together with the CloudFormation stack, the removal_policy should be changed back to RETAIN.
After a CMK resource has been deleted, there is a default waiting period of 30 days after which the CMK is erased. During the wait time, the CMK can’t be used in any cryptographic operation, but allows for recovery.
Furthermore, the CDK key definition makes use of so-called escape hatches in this example. These are required to access low-level CloudFormation resource constructs.
Because, as of this writing, the standard AWS CDK only allows us to define symmetric keys, we need to specify our asymmetric key definition and the key usage using this low-level AWS CDK API.
Using the low-level API, we can specify the key_spec and key_usage. You have to set the key_spec parameter to ECC_SECG_P256K1, which represents the same elliptic curve as used in Ethereum called secp256k1.
You need to set key_usage to SIGN_VERIFY for asymmetric CMKs.
Similar to the aws_km module, you have to import the aws_lambda module to specify Lambda resources:
lf = aws_lambda.Function(
self,
“Function”,
handler=”lambda_function.lambda_handler”,
runtime=aws_lambda.Runtime.PYTHON_3_8,
environment=env,
timeout=core.Duration.minutes(2),
code=code,
memory_size=256
)
This code example is located in the aws-kms-ethereum-accounts/aws_kms_lambda_ethereum/aws_kms_lambda_ethereum_stack.py file.
Besides creating and configuring CloudFormation resources, the AWS CDK also allows you to manage the permissions using the high-level Python objects.
In this post, only the Lambda function should use the AWS CMK resource. To ensure this, you can use the grant method that’s available on the CMK object. You need to pass the reference of your Lambda resource and the actions that you want to allow (‘kms:GetPublicKey’ and ‘kms:Sign’):
cmk.grant(eth_client.lf, ‘kms:GetPublicKey’)
cmk.grant(eth_client.lf, ‘kms:Sign’)
For more information about actions and permissions for AWS KMS, see AWS KMS permissions.
Docker-based build
Depending on the external dependencies that need to be available to your Lambda function, it can be sufficient to just point the Lambda constructor to a local file system folder. For more information, see Creating a serverless application using the AWS CDK.
This folder is then zipped during the synthesize step and uploaded to Amazon S3 during the deployment step. This mechanism works well if the Lambda function just requires the Boto3 library, which is available in the Python Lambda runtime environment.
If you need to provide additional dependencies, these dependencies need to be available in the root directory together with the Lambda source code files. For more information, see Tutorial: Creating a Lambda function in Python 3.8.
Certain Python dependencies must be compiled and installed in a Linux environment to prevent import issues in the Lambda environment, such as invalid ELF headers.
The same requirement applies to custom node.js packages and modules. For more information, see Using Packages and Native nodejs Modules in AWS Lambda.
Besides an Amazon Linux on EC2 based approach, you can use Docker-based bundling to install the dependencies and maintain the right file format.
To do so, run the pip install step (which is necessary to make available the Lambda requirements listed in the requirements.txt file) inside a Linux Docker container.
To use Docker-based bundling with the AWS CDK, a bundling_config has to be passed to the aws_lambda.Code.from_asset() method with a path to the source code of the Lambda function. The following example code is located in the aws-kms-ethereum-accounts/aws_kms_lambda_ethereum/aws_kms_lambda_ethereum_stack.py file:
bundling_docker_image = core.BundlingDockerImage.from_registry(
“lambci/lambda:build-python3.8”)
commands = [
“if [[ -f requirements.txt ]]; then pip install –target /asset-output -r requirements.txt; fi”,
“cp –parents $(find . -name ‘*.py’) /asset-output”
]
bundling_config = core.BundlingOptions(
image=bundling_docker_image, command=[“bash”, “-xe”, “-c”, ” && “.join(commands)]
)
code = aws_lambda.Code.from_asset(
path=dir, bundling=bundling_config
)
This bundling_config specifies a Docker image, lambci/lambda:build-python3.8, and a command to be run in the Docker container to bundle the dependencies.
For additional information of how to use Docker-based bundling for other programming languages like Golang, see Building, bundling, and deploying applications with the AWS CDK.
As an alternative to the custom bundling function, you can use the Amazon Lambda Python Library. This library handles the installation of all required modules in a Lambda-compatible Docker container according to the runtime, out of the box.
Ethereum key calculation
A detailed explanation of how to calculate the Ethereum public address based on the CMK public key is available in the second post in this series, Use AWS KMS to securely manage Ethereum identities: Part 2.
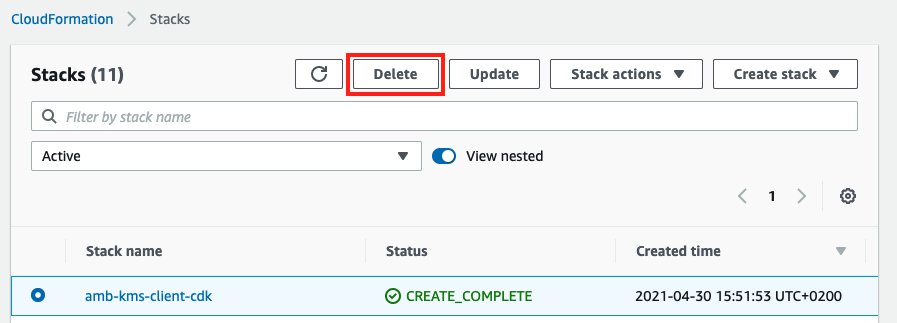
Clean up
To avoid incurring future charges, delete the resources. You can do this with the AWS CDK using the following command:
cdk destroy
You can also delete stacks deployed by the AWS CDK using the AWS CloudFormation console.
Conclusion
In this post, we showed how to create Lambda and CMK resources using the AWS CDK. Furthermore, we explained how to apply custom configuration to the AWS CDK objects in Python to create an Ethereum-compatible CMK instance. Also, we explained in detail how the AWS CDK allows the configuration and management of policies and access permissions.
The second post in this series includes a detailed explanation of how Ethereum signatures work and how to use the resources created in this post, namely the CMK instance and the associated Lambda function, to securely calculate them.
About the Author
David Dornseifer is a Blockchain Architect with the Amazon ProServe Blockchain team. He focuses on helping customers design, deploy and scale end-to-end Blockchain solutions.
Read MoreAWS Database Blog

 to securely manage Ethereum accounts: Part 1")