
Amazon DynamoDB offers two types of backups: point-in-time recovery (PITR) and on-demand backups. PITR is used to recover your table to any point in time in a rolling 35 day window, which is used to help customers mitigate accidental deletes or writes to their tables from bad code, malicious access, or user error. On demand backups are designed for long-term archiving and retention, which is typically used to help customers meet compliance and regulatory requirements.
This is the second of a series of two blog posts about using AWS Backup to set up scheduled on-demand backups for Amazon DynamoDB. Part 1 presents the steps to set up a scheduled backup for DynamoDB tables from the AWS Management Console. In this post, we show you how to use AWS Backup and tags to automate scheduled backups of a DynamoDB table. You learn how to create a backup plan that takes daily backups of all DynamoDB tables based on tags. When implementing backup processes at scale, organizations want the flexibility to define different backup strategies based on the needs of different resource groups. Organizations also want to ensure that their AWS resources are automatically backed up based on a defined strategy. For example, they want to schedule daily backups of all inventory related tables and hourly backups of sales related tables.
Prerequisites
The solution in this post uses the order_transaction-* table from part 1. If you have an existing DynamoDB table that you want to back up using AWS Backup, you can use that table instead.
Solution overview
This solution helps you scale backups within your organization by implementing a tag-based backup design for a group of DynamoDB tables. A tag is a label that can be used to categorize resources. A tag consists of a user-defined key and a value. Each time a tag-based backup is run, it scans your AWS account for all resources that match the specified tag value. By using tags, you need to define your backup plan and resource assignment only once.
The steps to implement the solution are:
Launch an AWS CloudFormation template to create the required resources.
Add tags to the DynamoDB table.
Monitor the backup.
Create the resources for the solution
To get started with this solution, you download a code snippet from GitHub and launch and configure a CloudFormation stack. The snippet defines the backup, including frequency and lifecycle configuration such as number of days before backup transitions to cold storage, and expiration. You can set these parameters to fit your requirements when you create the CloudFormation stack.
To create AWS resources to build the solution
Before getting started, we set up our resources. For this post, we use the us-east-1 Region.
Deploy the AWS resource using the provided AWS CloudFormation template:
Enter a Stack name and provide the parameters for your backup strategy.
LifecycleDeleteAfterDays: The number of days after creation that a recovery point is deleted.
LifecycleMoveToColdStorageAfterDays: The number of days after creation that a recovery point is moved to cold storage.
TagKey: The tag key associated with your DynamoDB tables to be backed up.
TagValue: The tag value associated with your DynamoDB tables to be backed up. You can use this field to add one tag value. To add multiple tag values, follow the Resource tag documentation to modify the CloudFormation stack file that you downloaded from GitHub.
Choose Next.
Accept the default settings and choose Next.
Select the checkbox next to I Acknowledge that AWS CloudFormation might create IAM resources and choose Create stack.
Alternatively , you can download the CloudFormation stack file from GitHub. Sign in to the AWS Management Console and navigate to CloudFormation. Choose Create stack and select With new resources (standard). Select Upload a template file and upload the stack file.
Review the resources created
In this section you review the resources created by the CloudFormation stack.
To review the resources created
In the console, navigate to Services and then to CloudFormation.
Choose the stack you created in the preceding step and then choose the Resources tab. The status of BackupPlan, BackupVault, and TagBasedBackupSelection is CREATE_COMPLETE.
In the console, navigate to Services and then to AWS Backup.
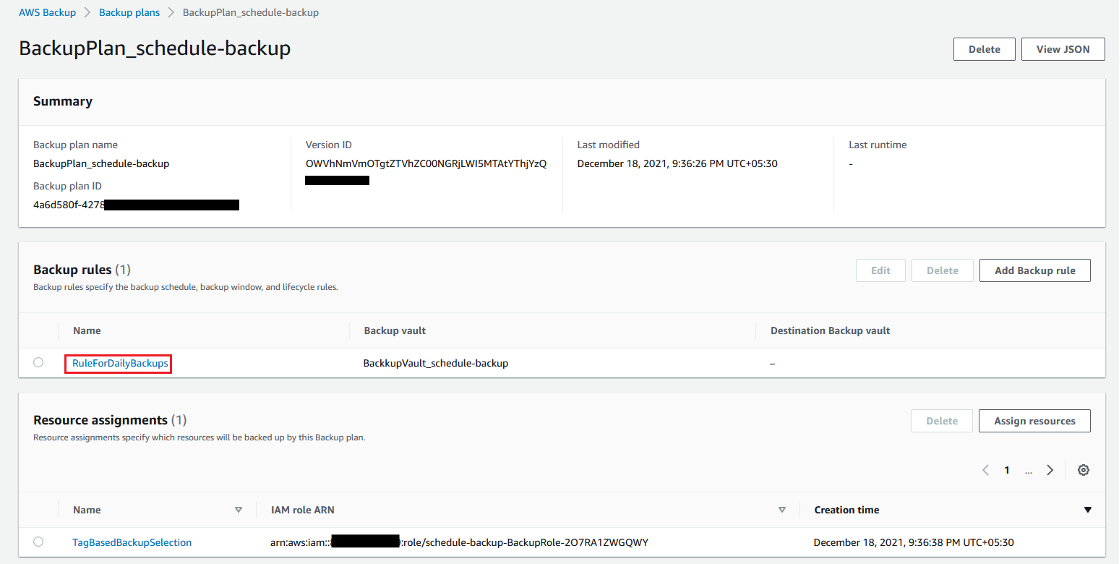
Go to Backup plans and select BackupPlan_*. Under Backup rules, select RuleForDailyBackups.
Review the summary of the backup plan, including frequency, lifecycle, backup vault, and other information.
In the console, navigate to Services and then to AWS Backup.
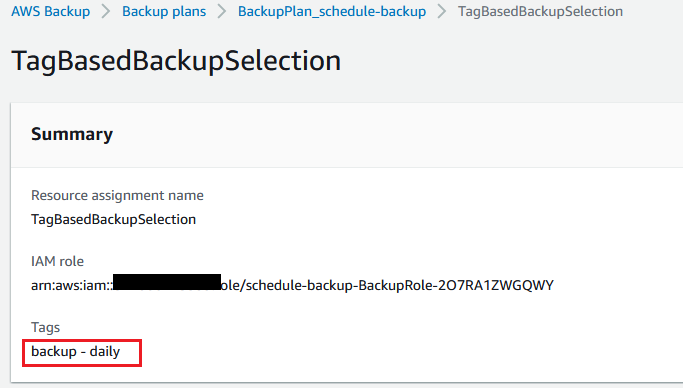
Navigate to Backup plans and choose BackupPlan_* to return to the backup plan summary page. Under Resource assignments, select TagBasedBackupSelection. Verify that the tag has the key backup and the value daily.
You use tags to identify what resources to back up. The following code snippet is the tag-based backup selection that matches the specified condition key and value while creating the CloudFormation stack :
Add a tag to the DynamoDB table
Now let’s add a tag to the DynamoDB table. You can add the same tag to groups of tables that have the same backup schedule. For example, if you need to schedule backups for all inventory tables, you can add the same tag to all these tables and provide the tag as an input when you create the CloudFormation stack. For this example, you add a tag to one DynamoDB table.
To add a tag to the DynamoDB table
Open the DynamoDB console. In the navigation pane, choose Tables.
Choose an existing table from the list and then choose the Additional settings tab. Choose Manage tags to add, edit, or delete tags.
Note: If you don’t have a table that you want to use for this example, you can create a DynamoDB table by using the CloudFormation template from Part 1 of this post. For this example, we used the order_transaction-* table from Part 1.
Choose Add new tag.
Enter backup as the tag key and daily as the tag value.
Choose Save changes.
Monitor the backup job
Use the console to monitor a tag-based backup of a DynamoDB table by an AWS Backup job.
To monitor the backup job
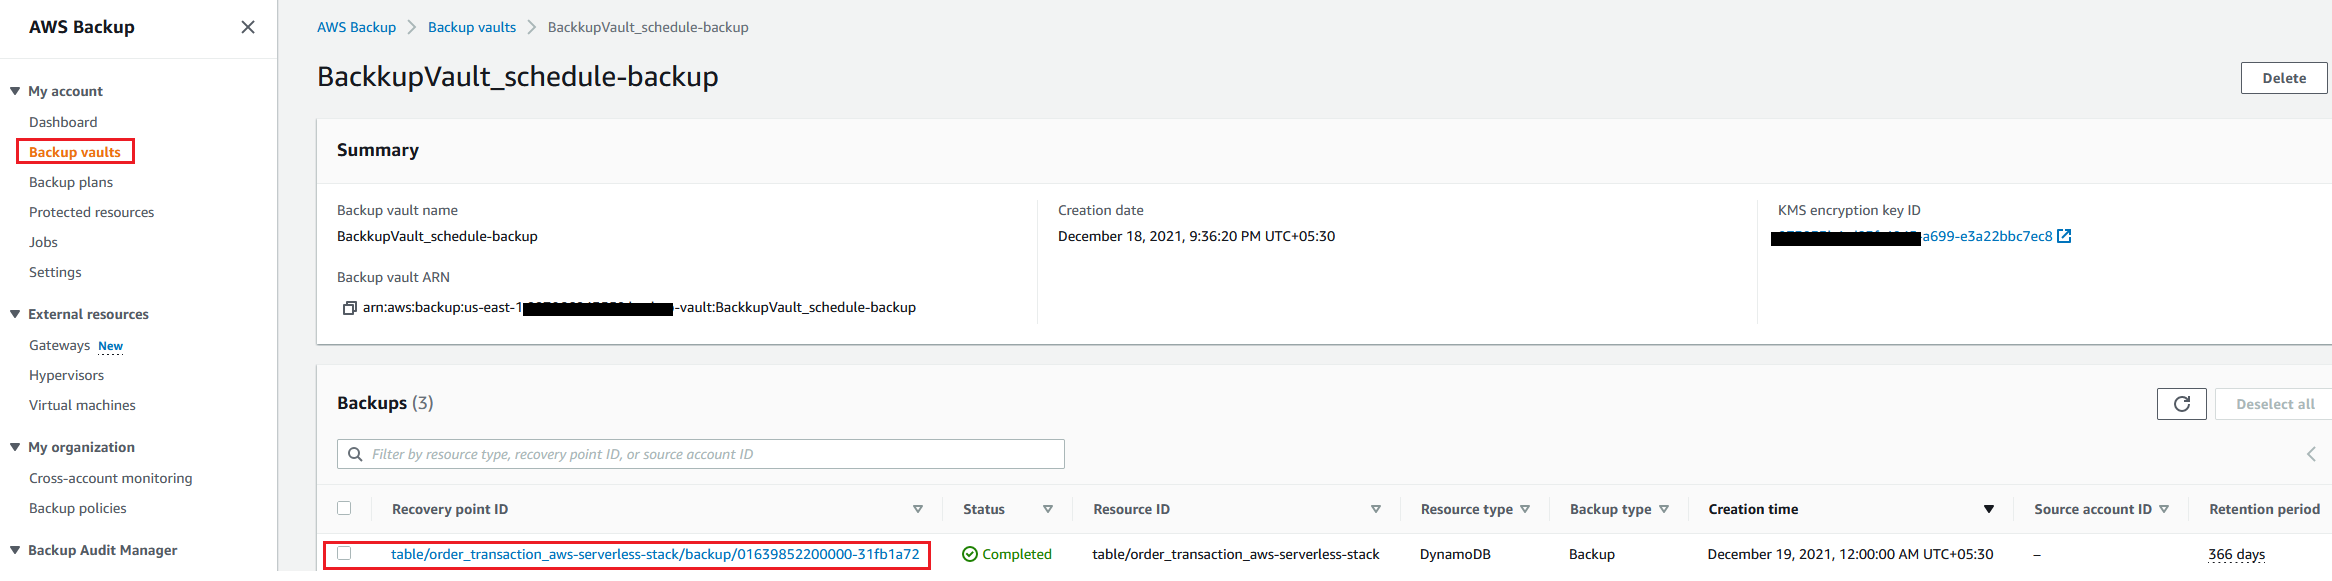
Open the AWS Backup console and select Jobs from the navigation pane. After your scheduled backup window, look for your backup job corresponding to the Resource ID table/<DynamoDB table name> and for status of Completed.
Select the job to see more details such as backup size and resource type.
You’ve successfully defined a backup strategy and backed up a DynamoDB table using AWS Backup based on a tag. The strategy includes scheduling backup frequency, when to move backups to cold storage, and when to delete backups.
Clean up the resources
To avoid incurring future charges, remove the resources created by this solution by using the CloudFormation console to delete the stack.
Conclusion
In this post, you learned how to define a backup strategy and use a custom tag to automate scheduled backups. You also walked through a sample scenario to automate the scheduled backup of a DynamoDB table using AWS Backup. You can use this information to scale your backup strategy within your organization. To learn more, see Using AWS Backup with DynamoDB.
To learn more about AWS Backup, see What is AWS Backup?
If you haven’t already, see part 1 of this blog post: Set up scheduled backups for Amazon DynamoDB using AWS Backup.
About the authors
Dhiraj Thakur is a Solutions Architect with AWS. He works with AWS customers and partners to provide guidance on enterprise cloud adoption, migration, and strategy. He is passionate about technology and enjoys building and experimenting in the analytics and AI and ML spaces.
Shlok Karpathak is a Solutions Architect with Amazon Web Services. He enjoys solving complex customer problems in databases and analytics and delivering successful outcomes and building scalable and robust solutions using AWS services.
Read MoreAWS Database Blog