

Recently, the Amazon SageMaker Studio launched an easy way to run notebooks as batch jobs that can run on a recurring schedule. Amazon SageMaker Studio Lab also supports this feature, enabling you to run notebooks that you develop in SageMaker Studio Lab in your AWS account. This enables you to quickly scale your machine learning (ML) experiments with bigger datasets and more powerful instances, without having to learn anything new or change one line of code.
In this post, we walk you through the one time prerequisite to connect your Studio Lab environment to an AWS account. After that, we walk you through the steps to run notebooks as a batch job from Studio Lab.
Solution overview
Studio Lab incorporated the same extension as Studio, which is based on the Jupyter open-source extension for scheduled notebooks. This extension has additional AWS-specific parameters, like the compute type. In Studio Lab, a scheduled notebook is first copied to an Amazon Simple Storage Service (Amazon S3) bucket in your AWS account, then run at the scheduled time with the selected compute type. When the job is complete, the output is written to an S3 bucket, and the AWS compute is completely halted, preventing ongoing costs.
Prerequisites
To use Studio Lab notebook jobs, you need administrative access to the AWS account you’re going to connect with (or assistance from someone with this access). In the rest of this post, we assume that you’re the AWS administrator, if that’s not the case, ask your administrator or account owner to review these steps with you.
Create a SageMaker execution role
We need to ensure that the AWS account has an AWS Identity and Access Management (IAM) SageMaker execution role. This role is used by SageMaker resources within the account, and provides access from SageMaker to other resources in the AWS account. In our case, our notebook jobs run with these permissions. If SageMaker has been used previously in this account, then a role may already exist, but it may not have all the permissions required. So let’s go ahead and make a new one.
The following steps only need to be done once, regardless of how many SageMaker Studio Lab environments will access this AWS account.
On the IAM console, choose Roles in the navigation pane.
Choose Create role.
For Trusted entity type, select AWS service.
For Use cases for other AWS Services, choose SageMaker.
Select SageMaker – Execution.
Choose Next.
Review the permissions, then choose Next.
For Role name, enter a name (for this post, we use sagemaker-execution-role-notebook-jobs).
Choose Create role.
Make a note of the role ARN.
The role ARN will be in the format of arn:aws:iam::[account-number]:role/service-role/[role-name] and is required in the Studio Lab setup.
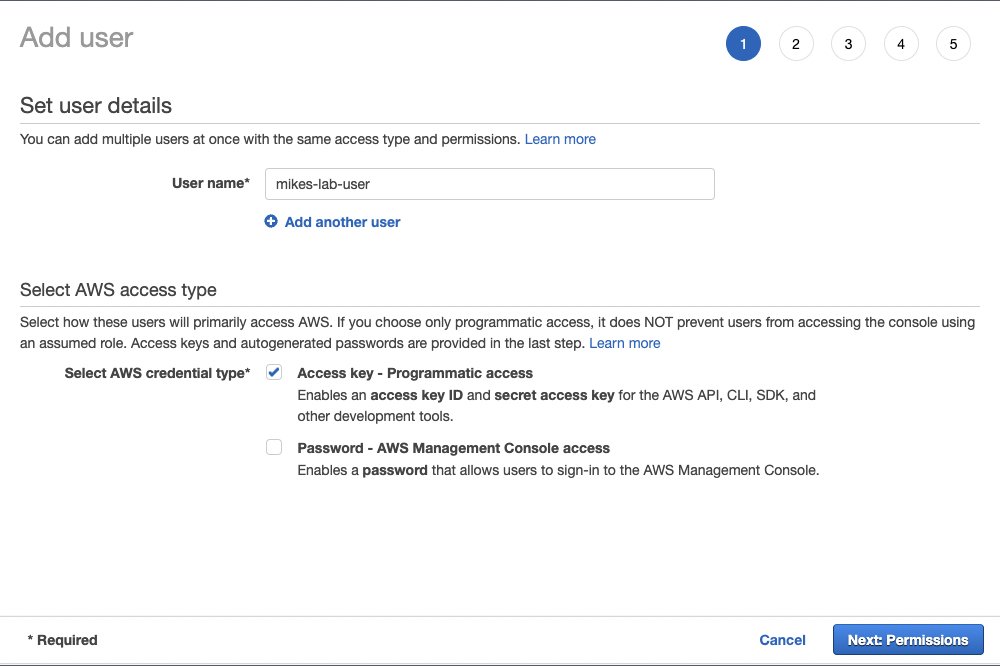
Create an IAM user
For a Studio Lab environment to access AWS, we need to create an IAM user within AWS and grant it necessary permissions. We then need to create a set of access keys for that user and provide them to the Studio Lab environment.
This step should be repeated for each SageMaker Studio Lab environment that will access this AWS account.
Note that administrators and AWS account owners should ensure that to the greatest extent possible, well-architected security practices are followed. For example, user permissions should always be scoped down, and access keys should be rotated regularly to minimize the impact of credential compromise.
In this blog we show how to use the AmazonSageMakerFullAccess managed policy. This policy provides broad access to Amazon SageMaker that may go beyond what is required. Details about AmazonSageMakerFullAccess can be found here.
Although Studio Lab employs enterprise security, it should be noted that Studio Lab user credentials don’t form part of your AWS account, and therefore, for example, are not subject to your AWS password or MFA policies.
To scope down permissions as much as possible, we create a user profile specifically for this access.
On the IAM console, choose Users in the navigation pane.
Choose Add users.
For User name, enter a name.It’s good practice to use a name that is linked to an individual person who will be using this account; this helps if reviewing audit logs.
For Select AWS access type, select Access key – Programmatic access.
Choose Next: Permissions.
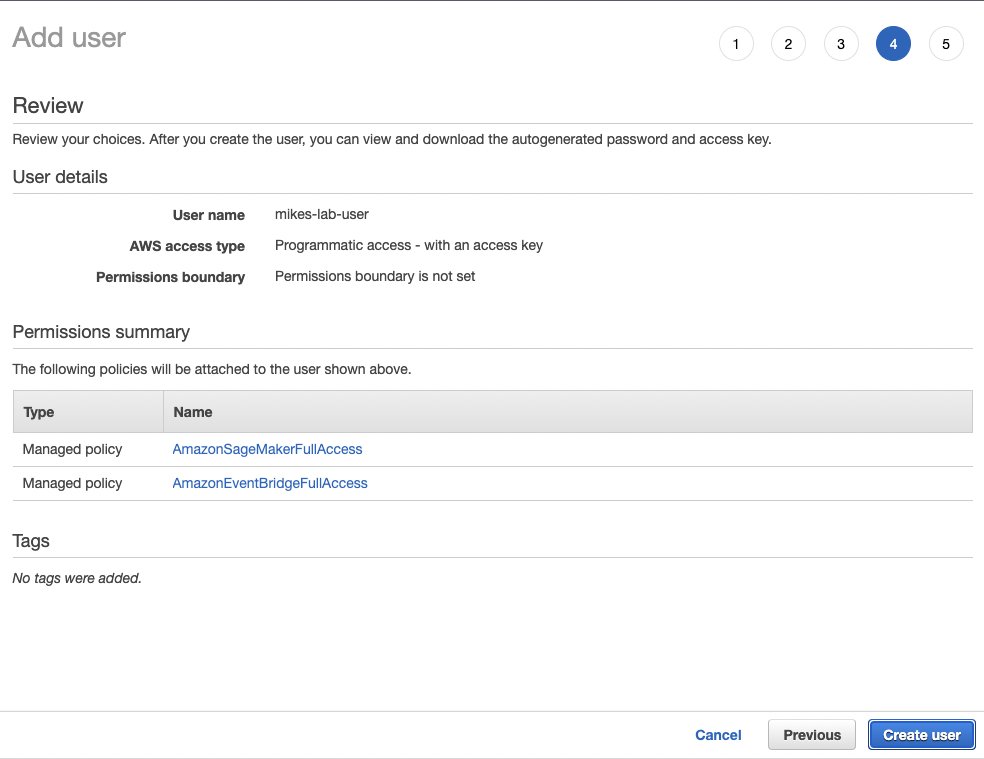
Choose Attach existing policies directly.
Search for and select AmazonSageMakerFullAccess.
Search for and select AmazonEventBridgeFullAccess.
Choose Next: Tags.
Choose Next: Review.
Confirm your policies, then choose Create user.The final page of the user creation process should show you the user’s access keys. Leave this tab open, because we can’t navigate back here and we need these details.
Open a new browser tab in Studio Lab.
On the File menu, choose New Launcher, then choose Terminal.
At the command line, enter the following code:
Enter the following code:
Enter the values from the IAM console page for your access key ID and secret access key.
For Default region name, enter us-west-2.
Leave Default output format as text.
Congratulations, your Studio Lab environment should now be configured to access the AWS account. To test the connection, issue the following command:
This command should return details about the IAM user your configured to use.
Create a notebook job
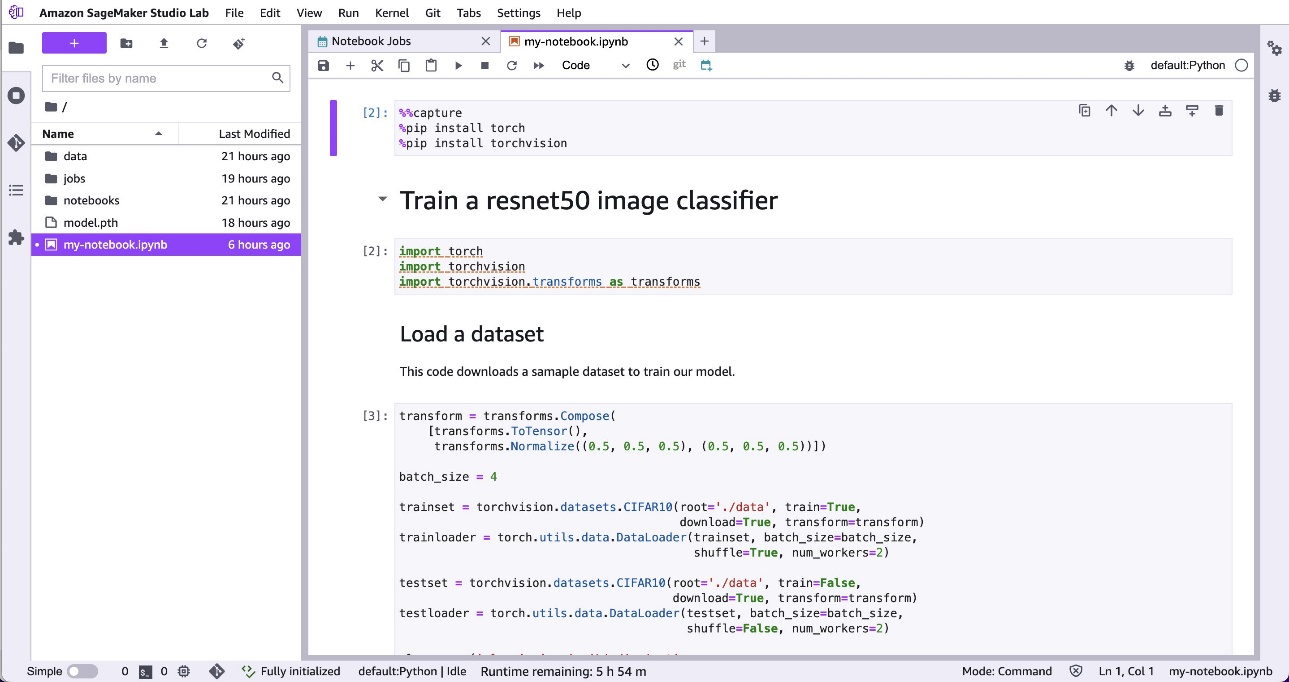
Notebook jobs are created using Jupyter notebooks within Studio Lab. If your notebook runs in Studio Lab, then it can run as a notebook job (with more resources and access to AWS services). However, there are a couple of things to watch for.
If you have installed packages to get your notebook working, add commands to load these packages in a cell at the top of your notebook. By using a & symbol at the start of each line, the code will be sent to the command line to run. In the following example, the first cell uses pip to install PyTorch libraries:
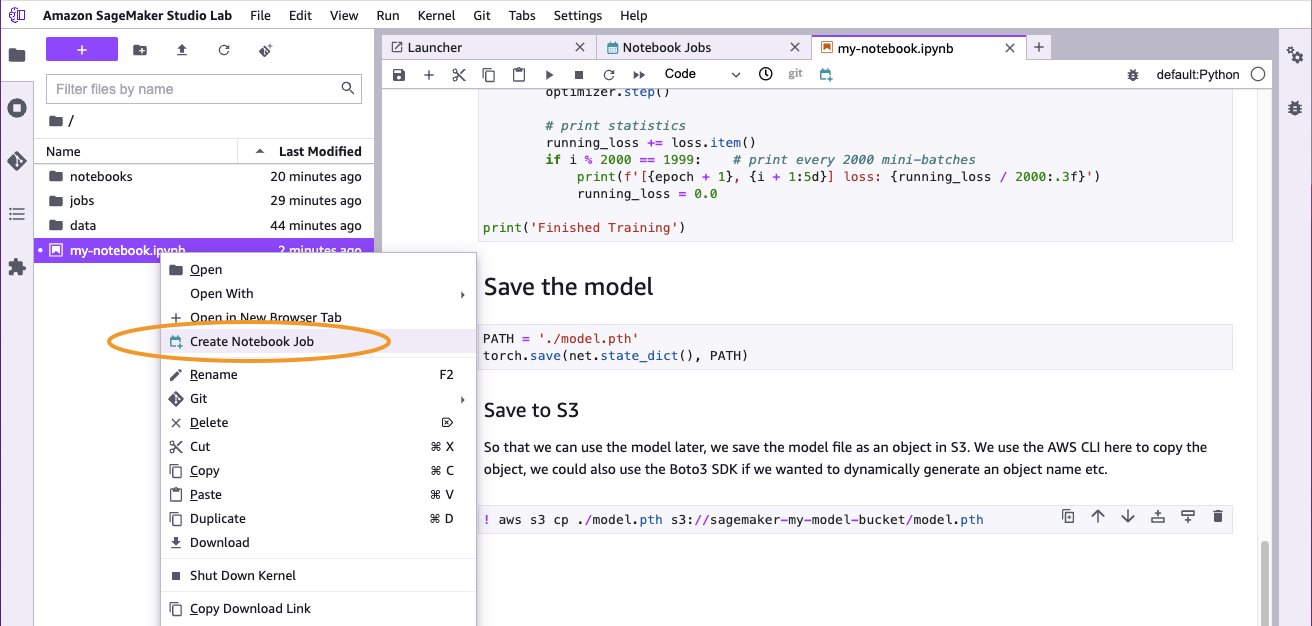
Our notebook will generate a trained PyTorch model. With our regular code, we save the model to the file system in Studio Labs.
When we run this as a notebook job, we need to save the model somewhere we can access it afterwards. The easiest way to do this is to save the model in Amazon S3. We created an S3 bucket to save our models, and use another command line cell to copy the object into the bucket.
We use the AWS Command Line Interface (AWS CLI) here to copy the object. We could also use the AWS SDK for Python (Boto3) if we wanted to have a more sophisticated or automated control of the file name. For now, we will ensure that we change the file name each time we run the notebook so the models don’t get overwritten.
Now we are ready to create the notebook job.
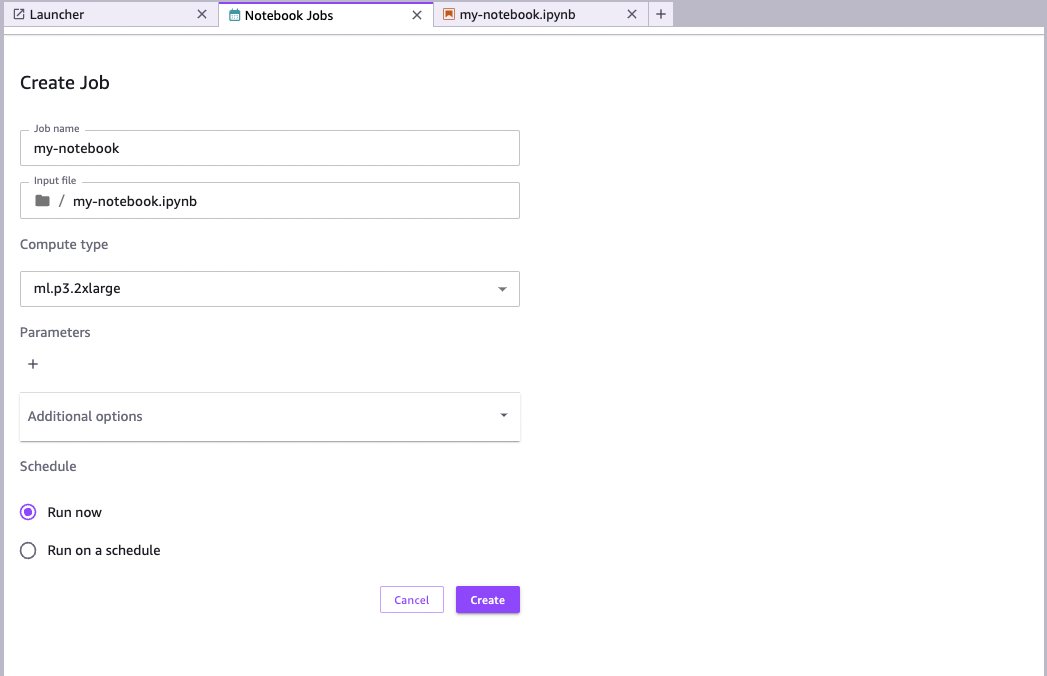
Choose (right-click) the notebook name, then choose Create Notebook Job.
If this menu option is missing, you may need to refresh your Studio Lab environment. To do this, open Terminal from the launcher and run the following code:
Next, restart your JupyterLab instance by choosing Amazon SageMaker Studio Lab from the top menu, then choose Restart JupyterLab.Alternatively, go to the project page, and shut down and restart the runtime.
On the Create job page, for Compute type, choose the compute type that suites your job.
For more information on the different types of compute capacity, including the cost, see Amazon SageMaker Pricing (choose On-Demand Pricing and navigate to the Training tab. You may also need to check the quota availability of the compute type in your AWS account. For more information about service quotas, see: AWS service quotas.For this example, we’ve selected an ml.p3.2xlarge instance, which offers 8 vCPU, 61 GB of memory and a Tesla V100 GPU.
If there are no warnings on this page, you should be ready to go. If there are warnings, check to ensure the correct role ARN is specified in Additional options. This role should match the ARN of the SageMaker execution role we created earlier.The ARN is in the format arn:aws:iam::[account-number]:role/service-role/[role-name].
There are other options available within Additional options; for example, you can select a particular image and kernel that may already have the configuration you need without the need to install additional libraries.
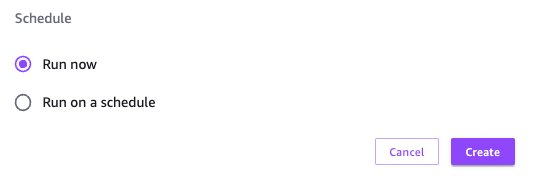
If you want to run this notebook on a schedule, select Run on a schedule and specify how often you want the job to run.We want this notebook to run once, so we select Run now.
Choose Create.
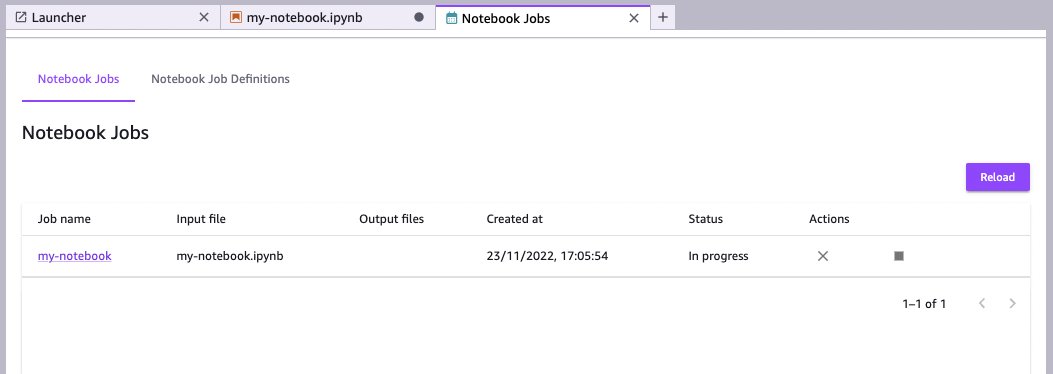
Notebook jobs list
The Notebook Jobs page lists all the jobs currently running and those that ran in the past. You can find this list from the Launcher (choose, File, New Launcher), then choose Notebook Jobs in the Other section.
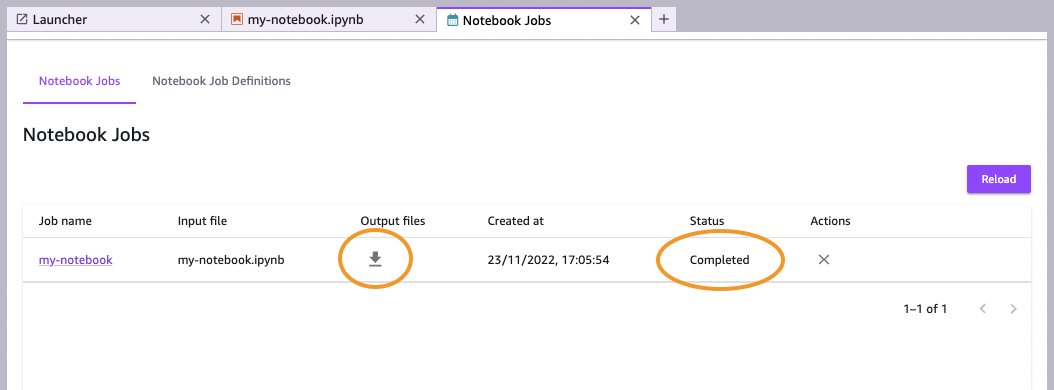
When the notebook job is complete, you will see the status change to Completed (use the Reload option if required). You can then choose the download icon to access the output files.
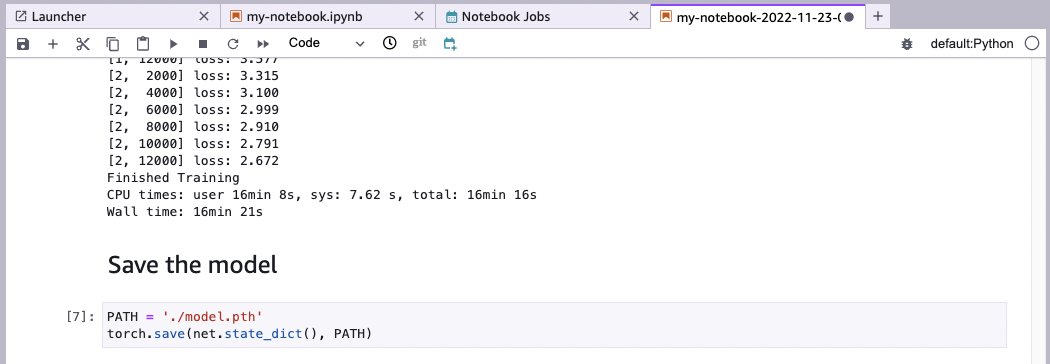
When the files have downloaded, you can review the notebook along with the code output and output log. In our case, because we added code to time the run of the training cell, we can see how long the training job took—16 minutes and 21 seconds, which is much faster than if the code had run inside of Studio Lab (1 hour, 38 minutes, 55 seconds). In fact, the whole notebook ran in 1,231 seconds (just over 20 minutes) at a cost of under $1.30 (USD).
W can now increase the number of epochs and adjust the hyperparameters to improve the loss value of the model, and submit another notebook job.
Conclusion
In this post, we showed how to use Studio Lab notebook jobs to scale out the code we developed in Studio Lab and run it with more resources in an AWS account.
By adding AWS credentials to our Studio Lab environment, not only can we access notebook jobs, but we can also access other resources from an AWS account right from within our Studio Lab notebooks. Take a look at the AWS SDK for Python.
This extra capability of Studio Lab lifts the limits of the kinds and sizes of projects you can achieve. Let us know what you build with this new capability!
About the authors
Mike Chambers is a Developer Advocate for AI and ML at AWS. He has spent the last 7 years helping builders to learn cloud, security and ML. Originally from the UK, Mike is a passionate tea drinker and Lego builder.
Michele Monclova is a principal product manager at AWS on the SageMaker team. She is a native New Yorker and Silicon Valley veteran. She is passionate about innovations that improve our quality of life.
Read MoreAWS Machine Learning Blog