

Python is an awesome programming language! It is one of the most popular languages for developing AI and machine learning applications. With a very easy to learn syntax, Python has some special features that distinguish it from other languages. In this tutorial, we’ll talk about some special attributes of the Python programming language.
After completing this tutorial, you will know:
Constructs for list and dictionary comprehension
How to use zip and enumerate functions
What are function contexts and decorators
What is the purpose of generators in Python
Let’s get started.
Tutorial Overview
This tutorial is divided into 4 parts; they are:
List and dictionary comprehension
Zip and enumerate functions
Function contexts and decorators
Generators in Python with example of Keras generator
Import Section
The libraries used in this tutorial are imported in the code below.
from tensorflow import keras
from tensorflow.keras.preprocessing.image import ImageDataGenerator
import numpy as np
import matplotlib.pyplot as plt
import math
List Comprehension
List comprehension provides a short, simple syntax for creating new lists from existing ones. For example, suppose we require a new list, where each new item is the old item multiplied by 3. One method is to use a for loop as shown below:
original_list = [1, 2, 3, 4]
times3_list = []
for i in original_list:
times3_list.append(i*3)
print(times3_list)
[3, 6, 9, 12]
The shorter method using list comprehension requires only a single line of code:
time3_list_awesome_method = [i*3 for i in original_list]
print(time3_list_awesome_method)
[3, 6, 9, 12]
You can even create a new list based on a special criterion. For example, if we want only even numbers added to the new list.
even_list_awesome_method = [i for i in original_list if i%2==0]
print(even_list_awesome_method)
[2, 4]
It is also possible to have an else associated with the above. For example, we can leave all even numbers intact and replace the odd numbers by zero:
new_list_awesome_method = [i if i%2==0 else 0 for i in original_list]
print(new_list_awesome_method)
[0, 2, 0, 4]
List comprehension can also used to replace nested loops. For example the following:
colors = [“red”, “green”, “blue”]
animals = [“cat”, “dog”, “bird”]
newlist = []
for c in colors:
for a in animals:
newlist.append(c + ” ” + a)
print(newlist)
[‘red cat’, ‘red dog’, ‘red bird’, ‘green cat’, ‘green dog’, ‘green bird’, ‘blue cat’, ‘blue dog’, ‘blue bird’]
can be done as follows, with two “for” inside the list comprehension:
colors = [“red”, “green”, “blue”]
animals = [“cat”, “dog”, “bird”]
newlist = [c+” “+a for c in colors for a in animals]
print(newlist)
Syntax
Syntax for list comprehension is given by:
newlist = [expression for item in iterable if condition == True]
Or
newList = [expression if condition == True else expression for item in iterable]
Dictionary Comprehension
Dictionary comprehension is similar to list comprehension, except now we have (key, value) pairs. Here is an example; we’ll modify each value of the dictionary by concatenating the string ‘number ‘ to each value:
original_dict = {1: ‘one’, 2: ‘two’, 3: ‘three’, 4: ‘four’}
new_dict = {key:’number ‘ + value for (key, value) in original_dict.items()}
print(new_dict)
{1: ‘number one’, 2: ‘number two’, 3: ‘number three’, 4: ‘number four’}
Again, conditionals are also possible. We can choose to add (key, value) pairs based on a criterion in the new dictionary.
#Only add keys which are greater than 2
new_dict_high_keys = {key:’number ‘ + value for (key, value) in original_dict.items() if key>2}
print(new_dict_high_keys)
# Only change values with key>2
new_dict_2 = {key:(‘number ‘ + value if key>2 else value) for (key, value) in original_dict.items() }
print(new_dict_2)
{3: ‘number three’, 4: ‘number four’}
{1: ‘one’, 2: ‘two’, 3: ‘number three’, 4: ‘number four’}
Enumerators and Zip in Python
In Python an iterable is defined as any data structure that can return all its items, one at a time. This way you can use a for loop for further processing of all items one by one. Python has two additional constructs that make for loops easier to use, i.e., enumerate() and zip().
Enumerate
In traditional programming languages, you need a loop variable to iterate through different values of a container. In Python this is simplified by giving you access to a loop variable along with one value of the iterable object. The enumerate(x) function returns two iterables. One iterable varies from 0 to len(x)-1. The other is an iterable with value equal to items of x. An example is shown below:
name = [‘Triangle’, ‘Square’, ‘Hexagon’, ‘Pentagon’]
# enumerate returns two iterables
for i, n in enumerate(name):
print(i, ‘name: ‘, n)
0 name: Triangle
1 name: Square
2 name: Hexagon
3 name: Pentagon
By default, enumerate starts at 0 but we can start at some other number if we specified it. This is useful in some situation, for example:
data = [1,4,1,5,9,2,6,5,3,5,8,9,7,9,3]
for n, digit in enumerate(data[5:], 6):
print(“The %d-th digit is %d” % (n, digit))
The 6-th digit is 2
The 7-th digit is 6
The 8-th digit is 5
The 9-th digit is 3
The 10-th digit is 5
The 11-th digit is 8
The 12-th digit is 9
The 13-th digit is 7
The 14-th digit is 9
The 15-th digit is 3
Zip
Zip allows you to create an iterable object of tuples. Zip takes as argument multiple containers $(m_1, m_2, ldots, m_n)$, and creates the i-th tuple by pairing one item from each container. The i-th tuple is then $(m_{1i}, m_{2i}, ldots, m_{ni})$. If the passed objects have different lengths, then the total number of tuples formed have a length equal to the minimum length of passed objects.
Below are examples of using both zip() and enumerate().
sides = [3, 4, 6, 5]
colors = [‘red’, ‘green’, ‘yellow’, ‘blue’]
shapes = zip(name, sides, colors)
# Tuples are created from one item from each list
print(set(shapes))
# Easy to use enumerate and zip together for iterating through multiple lists in one go
for i, (n, s, c) in enumerate(zip(name, sides, colors)):
print(i, ‘Shape- ‘, n, ‘; Sides ‘, s)
{(‘Triangle’, 3, ‘red’), (‘Square’, 4, ‘green’), (‘Hexagon’, 6, ‘yellow’), (‘Pentagon’, 5, ‘blue’)}
0 Shape- Triangle ; Sides 3
1 Shape- Square ; Sides 4
2 Shape- Hexagon ; Sides 6
3 Shape- Pentagon ; Sides 5
Function Context
Python allows nested functions, where you can define an inner function within an outer function. There are some awesome features related to nested functions in Python.
The outer function can return a handle to the inner function
The inner function retains all its environment and variables local to it and in its enclosing function even if the outer function ends its execution.
An example is given below with explanation in comments.
def circle(r):
area = 0
def area_obj():
nonlocal area
area = math.pi * r * r
print(“area_obj”)
return area_obj
def circle(r):
area_val = math.pi * r * r
def area():
print(area_val)
return area
# returns area_obj(). The value of r passed is retained
circle_1 = circle(1)
circle_2 = circle(2)
# Calling area_obj() with radius = 1
circle_1()
# Calling area_obj() with radius = 2
circle_2()
3.141592653589793
12.566370614359172
Decorators in Python
Decorators are a powerful feature of Python. You can use decorators to customize the working of a class or a function. Think of them as a function applied to another function. Use the function name with @ symbol to define the decorator function on the decorated function. The decorator takes a function as argument, giving a lot of flexibility.
Consider the following function square_decorator() that takes a function as an argument, and also returns a function.
The inner nested function square_it()takes an argument arg.
The square_it()function applies the function to arg and squares the result.
We can pass a function such as sin to square_decorator(), which in turn would return $sin^2(x)$.
You can also write your own customized function and use the square_decorator() function on it using the special @symbol as shown below. The function plus_one(x) returns x+1. This function is decorated by the square_decorator() and hence, we get $(x+1)^2$.
def square_decorator(function):
def square_it(arg):
x = function(arg)
return x*x
return square_it
size_sq = square_decorator(len)
print(size_sq([1,2,3]))
sin_sq = square_decorator(math.sin)
print(sin_sq(math.pi/4))
@square_decorator
def plus_one(a):
return a+1
a = plus_one(3)
print(a)
9
0.4999999999999999
16
Generators in Python
Generators in Python allow you to generate sequences. Instead of writing a return statement, a generator returns multiple values via multiple yield statements. The first call to the function returns the first value from yield. The second call returns the second value from yield and so on.
The generator function can be invoked via next().Every time next() is called the next yield value is returned. An example of generating the Fibonacci sequence up till a given number x is shown below.
def get_fibonacci(x):
x0 = 0
x1 = 1
for i in range(x):
yield x0
temp = x0 + x1
x0 = x1
x1 = temp
f = get_fibonacci(6)
for i in range(6):
print(next(f))
0
1
1
2
3
5
Example of Data Generator in Keras
One use of generator is the data generator in Keras. The reason it is useful is that we do not want to keep all data in memory but want to create it on the fly when the training loop needs it. Remember in Keras, a neural network model is trained in batches, so a generator are to emit batches of data. The function below is from our previous post “Using CNN for financial time series prediction“:
def datagen(data, seq_len, batch_size, targetcol, kind):
“As a generator to produce samples for Keras model”
batch = []
while True:
# Pick one dataframe from the pool
key = random.choice(list(data.keys()))
df = data[key]
input_cols = [c for c in df.columns if c != targetcol]
index = df.index[df.index < TRAIN_TEST_CUTOFF]
split = int(len(index) * TRAIN_VALID_RATIO)
if kind == ‘train’:
index = index[:split] # range for the training set
elif kind == ‘valid’:
index = index[split:] # range for the validation set
# Pick one position, then clip a sequence length
while True:
t = random.choice(index) # pick one time step
n = (df.index == t).argmax() # find its position in the dataframe
if n-seq_len+1 < 0:
continue # can’t get enough data for one sequence length
frame = df.iloc[n-seq_len+1:n+1]
batch.append([frame[input_cols].values, df.loc[t, targetcol]])
break
# if we get enough for a batch, dispatch
if len(batch) == batch_size:
X, y = zip(*batch)
X, y = np.expand_dims(np.array(X), 3), np.array(y)
yield X, y
batch = []
The function above is to pick a random row of a pandas dataframe as a starting point and clip next several rows as one time interval sample. This process is repeated several times to collect many time intervals into one batch. When we collected enough number of interval samples, at the second last line in the above function, the batch is dispatched using the yield command. As you may already noticed, generator functions do not have return statement. In this example, the function even will run forever. This is useful and necessary because it allows our Keras training process to run as many epoch as we want.
If we do not use generator, we will need to convert the dataframe into all possible time intervals and keep them in the memory for the training loop. This will be a lot of repeating data (because the time intervals are overlapping) and takes up a lot of memory.
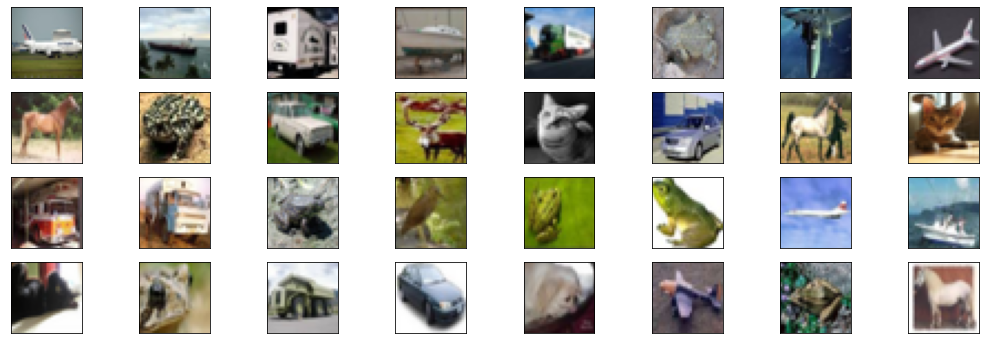
Because it is useful, Keras has some generator function predefined in the library. Below is an example of ImageDataGenerator(). We have loaded the cifar10 dataset of 32×32 images in x_train. The data is connected to the generator via flow() method. The next() function returns the next batch of data. In the example below, there are 4 calls to next(). In each case 8 images are returned as the batch size is 8.
Below is the entire code that also displays all images after every call to next().
(x_train, y_train), _ = keras.datasets.cifar10.load_data()
datagen = ImageDataGenerator()
data_iterator = datagen.flow(x_train, y_train, batch_size=8)
fig,ax = plt.subplots(nrows=4, ncols=8,figsize=(18,6),subplot_kw=dict(xticks=[], yticks=[]))
for i in range(4):
# The next() function will load 8 images from CIFAR
X, Y = data_iterator.next()
for j, img in enumerate(X):
ax[i, j].imshow(img.astype(‘int’))
Further Reading
This section provides more resources on the topic if you are looking to go deeper.
Python Documentation
Python Documentation at python.org
Books
Think Python: How to Think Like a Computer Scientist by Allen B. Downey
Programming in Python 3: A Complete Introduction to the Python Language by Mark Summerfield
Python Programming: An Introduction to Computer Science by John Zelle
API Reference
Summary
In this tutorial, you discovered special features of Python
Specifically, you learned:
The purpose of list and dictionary comprehension
How to use zip and enumerate
Nested functions, function contexts and decorators
Generators in Python and the ImageDataGenerator in Python
Do you have any questions about Python features discussed in this post? Ask your questions in the comments below and I will do my best to answer.
The post More special features in Python appeared first on Machine Learning Mastery.
Read MoreMachine Learning Mastery