

Conversational interfaces (or chatbots) can provide an intuitive interface for processes such as creating and monitoring tickets. Let’s consider a situation in which a recent hire on your team is required to cut tickets for office equipment. To do so, they have to interact with a ticketing software that the organization uses. This often requires accessing the ticketing system, knowing which ticket to open, and then tracking the ticket manually through the process until completion. In this post, we show you how to integrate an Amazon Lex chatbot with ServiceNow . The bot will make it easier for creation and tracking of tickets for day-to-day activities such as issuing new office equipment for new hires. You can also integrate the experience into a customer support call to seamlessly create tickets for the callers.
Solution overview
The following diagram illustrates the solution workflow.
The solution includes the following steps:
A user sends a message to create a ticket or get pending tickets in the queue through a Slack app.
Slack forwards the message to be processed by Amazon Lex.
Amazon Lex invokes fulfillment Lambda function:
Amazon Lex sends the event to the fulfillment AWS Lambda function.
AWS Lambda function processes the message and makes HTTP requests to the backend ServiceNow instance.
Response is sent to the user:
The ServiceNow instance returns a response to the fulfillment Lambda function.
Fulfillment Lambda function returns the response to Amazon Lex bot based on Sentiment.
Amazon Lex returns the response to the user through Slack bot.
The user is able to see the response on the Slack bot and reply with another query.
To implement this architecture, you create the following:
A ServiceNow instance
The fulfillment Lambda function
An Amazon Lex bot
A Slack app
Prerequisites
Before getting started, make sure you have the following prerequisites:
A Slack account
A ServiceNow developer account
An active AWS account with the permission to create and modify AWS Identity and Access Management (IAM) resources
Create the ServiceNow developer instance
To create your ServiceNow instance, complete the following steps:
Sign up for a ServiceNow developer instance.
You receive an email with a personal sandbox environment in the format devNNNNN.service-now.com.
This step sends a verification email to the email that you used during the signup process.
After you’re verified, you can sign in to your account.
Enter your email and choose Next.
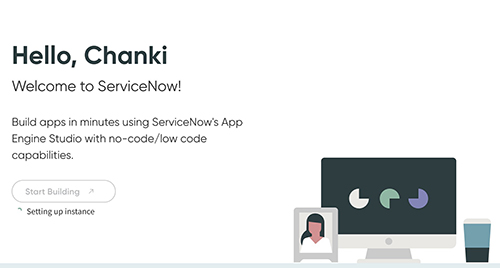
You’re asked if you need a developer oriented IDE or a guided experience.
For this post, choose I need a guided experience.
Select the check box to agree to the terms of service and choose Finish Setup.
You’re redirected to a page where you should be able to see that the instance is being set up.
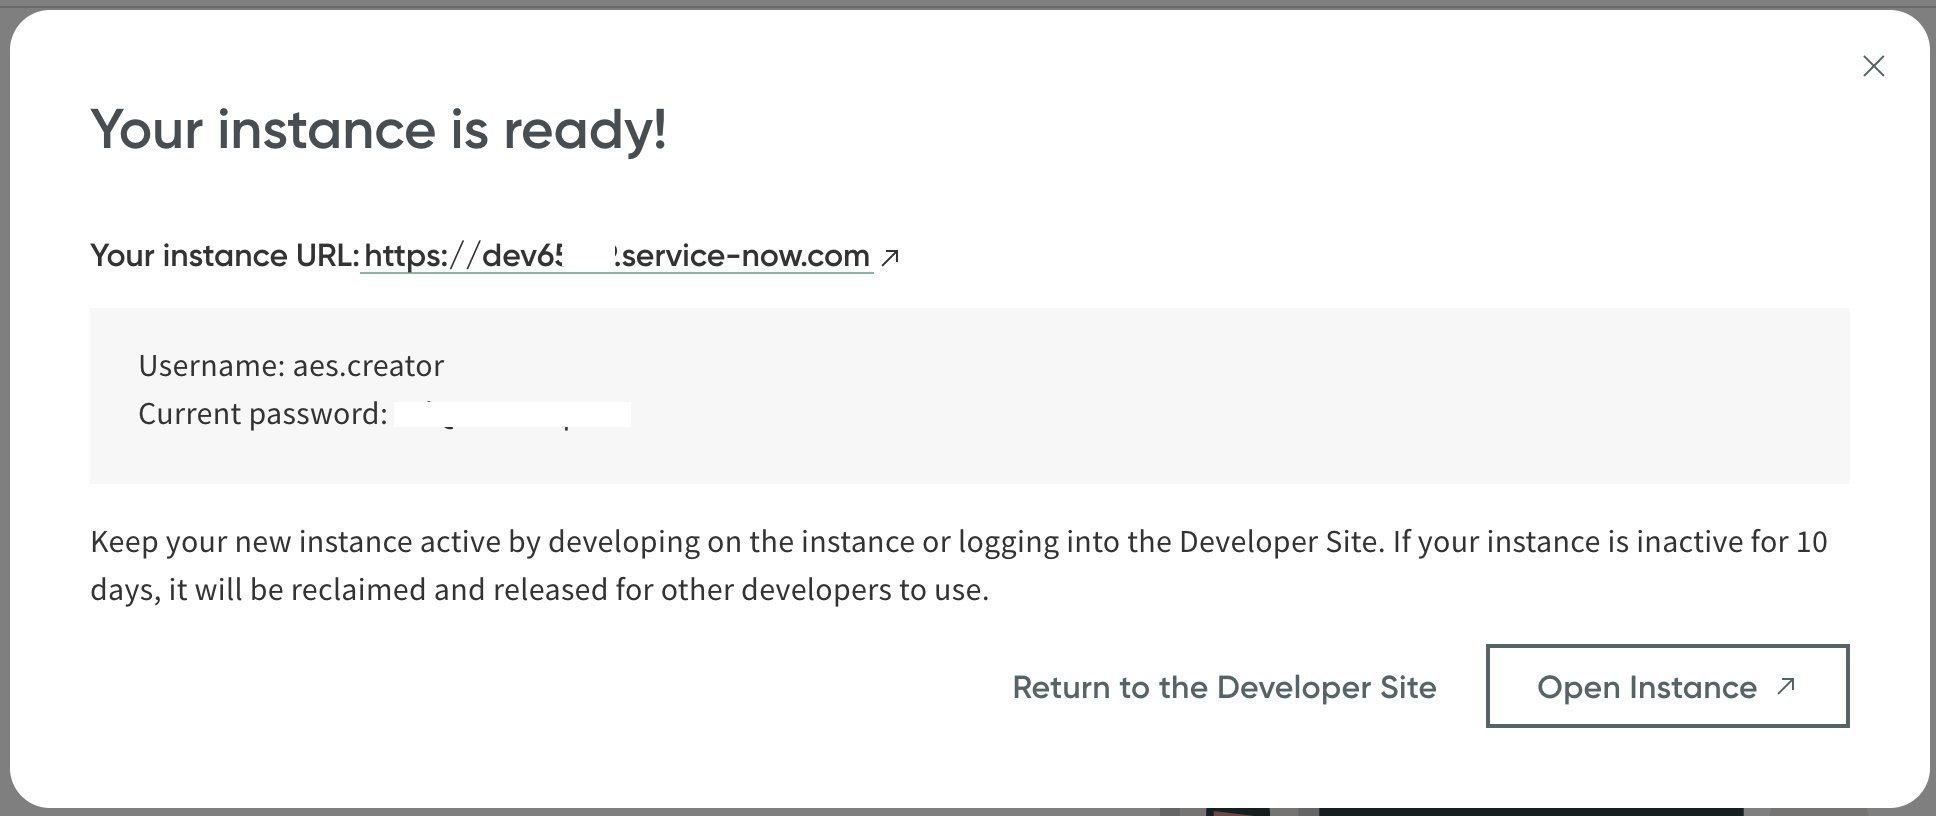
When the instance is ready, you should be able to see the instance details.
Note the instance URL, user name, and password, which you use in the following steps.
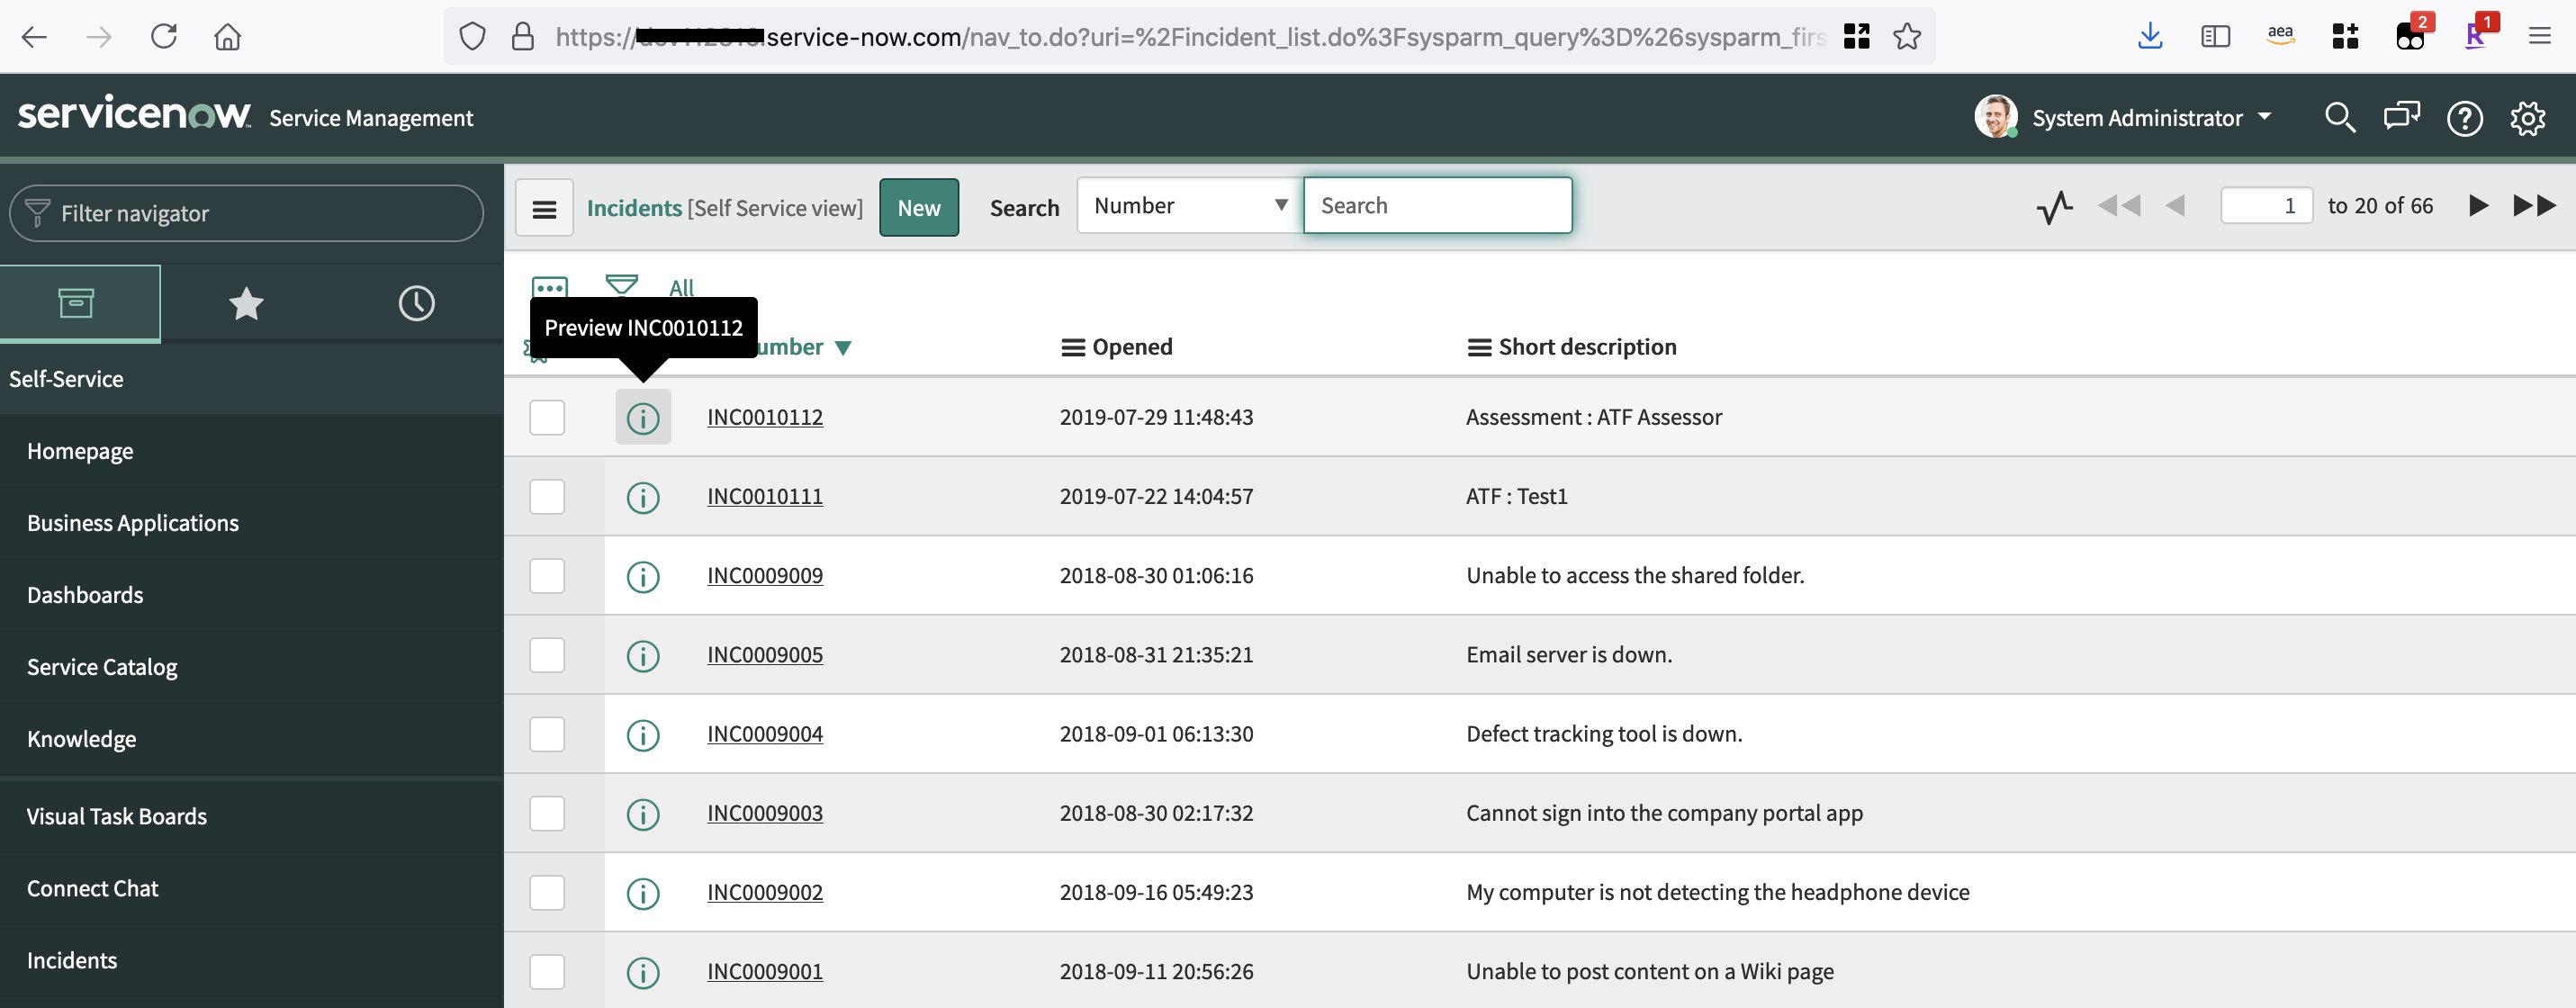
You need to log in as the system administrator user so you can view the ServiceNow incidents.
Navigate to the following URL (replace https://devNNNNN.service-now.com with your own instance URL that you noted earlier): https://devNNNNN.service-now.com/nav_to.do?uri=change_request_list.do.
Log in using the user name admin and the password you noted earlier.
You’re redirected to the ServiceNow console.
Choose Incidents in the navigation pane.
The default search criteria should show you a sample incident.
If you remove all the search criteria and choose Run, you should be able to see all the ServiceNow incidents available.
The following screenshot shows the search with no filters and the sample ServiceNow incidents.
Create the Lambda function
Now that you have set up a ServiceNow instance and logged in to check out the incidents, you’re ready to set up the solution. The first step is to create the Lambda function and configure environment variables for this function for storing the ServiceNow instance URL and credentials in a secure manner, and for the function to use the ServiceNow instance account.
Create the fulfillment Lambda function
In this step, you create a Lambda function that helps the Amazon Lex bot communicate with ServiceNow to create or describe the incidents, and have some logic to frame a response to Amazon Lex based on the sentiment analysis that Amazon Lex forwards to Lambda. To create your function, complete the following steps:
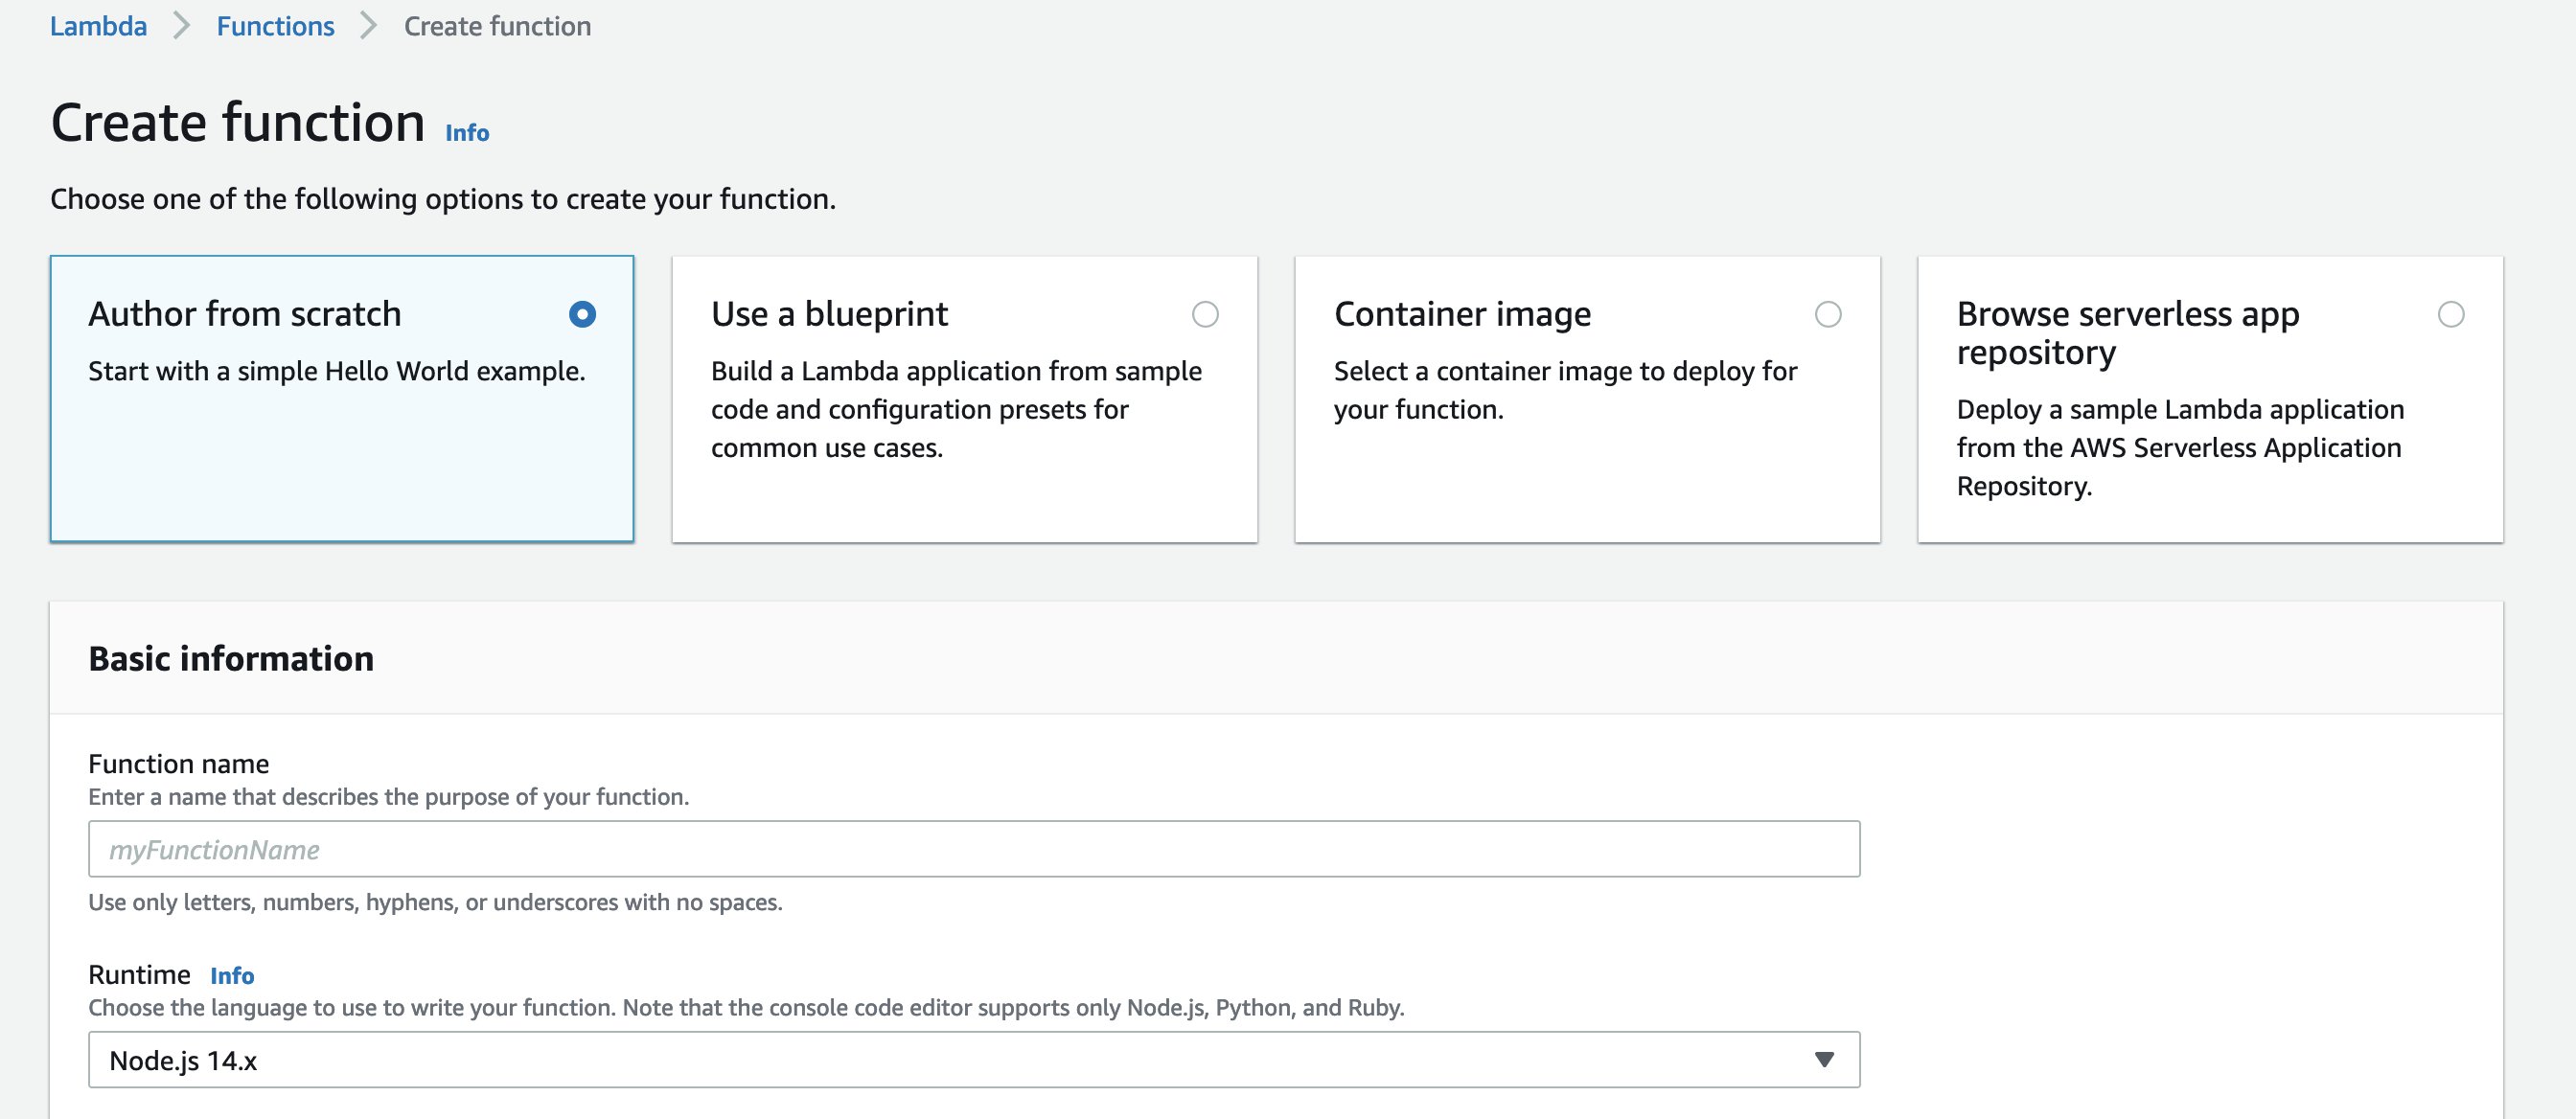
On the Lambda console, choose Functions in the navigation pane.
Choose Create function.
Select Author from scratch.
For Function name, enter a name (for this post, ChatBotLambda).
For Runtime, choose Node.js 14x.
We use the latest Node.js runtime (as of this writing), but you can use your preferred runtime.
For the function permissions, select Create a new role with basic Lambda permissions.
Use the policy AWSLambdaBasicExecutionRole.
This execution role should be sufficient for this post. For more information, see AWS Lambda execution role.
Choose Create function.
After you create the function, you can use the inline editor to edit the code for index.js.
The following is sample code for the function that you’re using as the compute layer for our logic:
Before moving on to the next step, don’t forget to choose Deploy to deploy this code to the $LATEST version of the Lambda function.
Configure the fulfillment Lambda function
Next, you create the following environment variables with appropriate values. You use these variables to securely store the ServiceNow instance URL and credentials that the function uses to connect to the ServiceNow instance. Every time the user sends a message through the Amazon Lex bot to create or get incident tickets, this Lambda function is invoked to make a request to the ServiceNow instance to create or get the incidents. Therefore, it needs the instance URL and credentials in order to connect to the instance.
SERVICENOW_HOST – The domain name for the ServiceNow instance that you created earlier
SERVICENOW_USERNAME – The user name for the system administrator role (admin)
SERVICENOW_PASSWORD – The password that you received earlier
These variables are available on the Configuration tab, as shown in the following screenshot.
Create the Amazon Lex chatbot
Now that you have created the Lambda function, you create the conversational interface (the chatbot) using Amazon Lex. For this post, you build the chatbot IncidentBot to communicate with ServiceNow and read or create incident tickets to process the events. This type of bot can be created for organizations or businesses that have multiple interfaces to internal systems, ranging from HR to travel to support, which employees must memorize for bookmarks. The chatbot also performs sentiment analysis on the users’ messages sent via the bot and returns a response based on the sentiment detected.
You create two intents:
GetTicket – Gets the existing tickets from ServiceNow
LogTicket – Submits a new ticket, which creates a ServiceNow incident in our instance
This post uses the following conversation to model a bot:
User: Create an incident ticket to order a new laptop.
IncidentBot: Done! I’ve opened an incident ticket for you in ServiceNow. Your ticket number is: INC0010006.
User: List top 2 incident.
IncidentBot: Here are the 2 most recent incidents: Record 1 order a new laptop. Record 2 request access to ServiceNow. End of tickets.
The Lambda function that you set up earlier only works with Lex V2. If you’re using the V1 console, choose Try the new Lex V2 Console as shown in the following screenshot, or choose Switch to the new Lex V2 Console in the navigation pane.
Complete the following steps to create your chatbot:
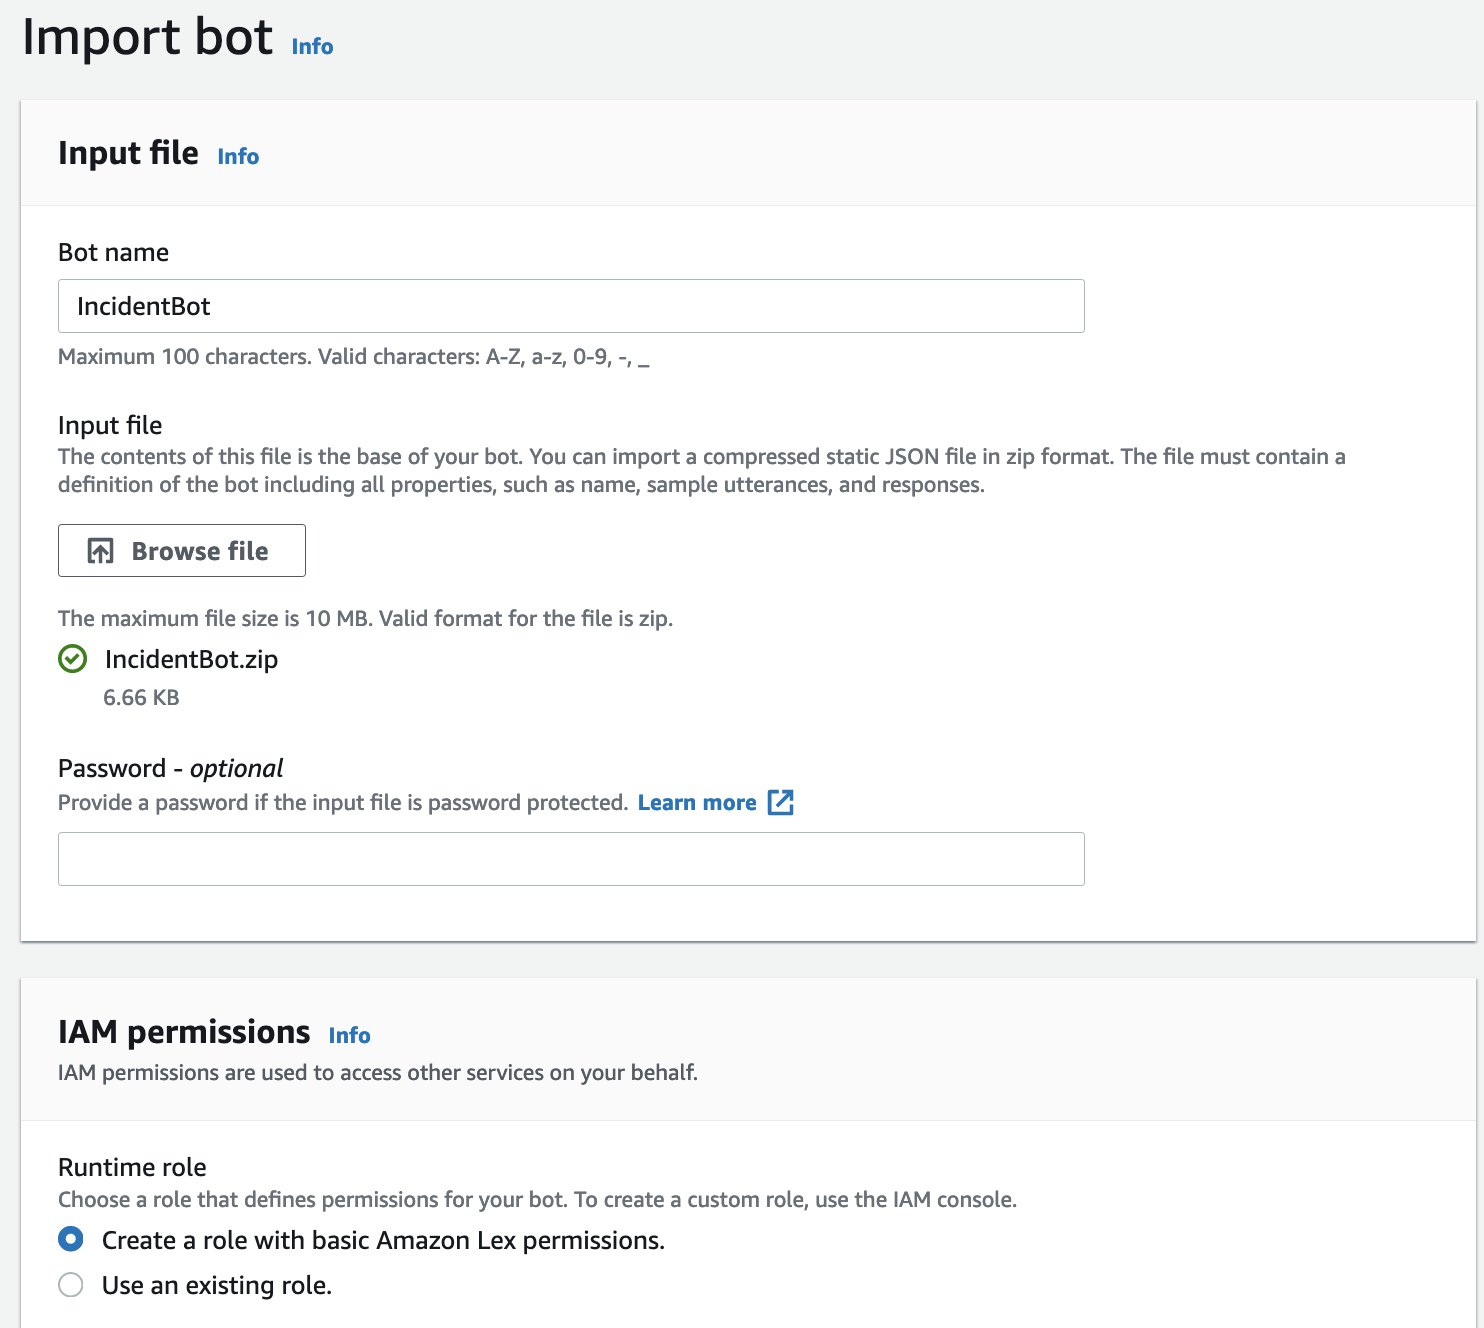
Download the file IncidentBot.zip.
On the Amazon Lex console, choose Bots in the navigation pane.
On the Action menu, choose Import.
For Bot name, enter IncidentBot.
For Input file¸ choose Browse file and choose the .zip file you downloaded.
Select Create a role with basic Amazon Lex permissions.
This creates a new IAM role that the chatbot uses to make requests to other AWS services.
In the section Children’s Online Privacy Protection Act (COPPA), select No (COPPA doesn’t apply to this example).
Keep the remaining fields at their default and choose Create bot.
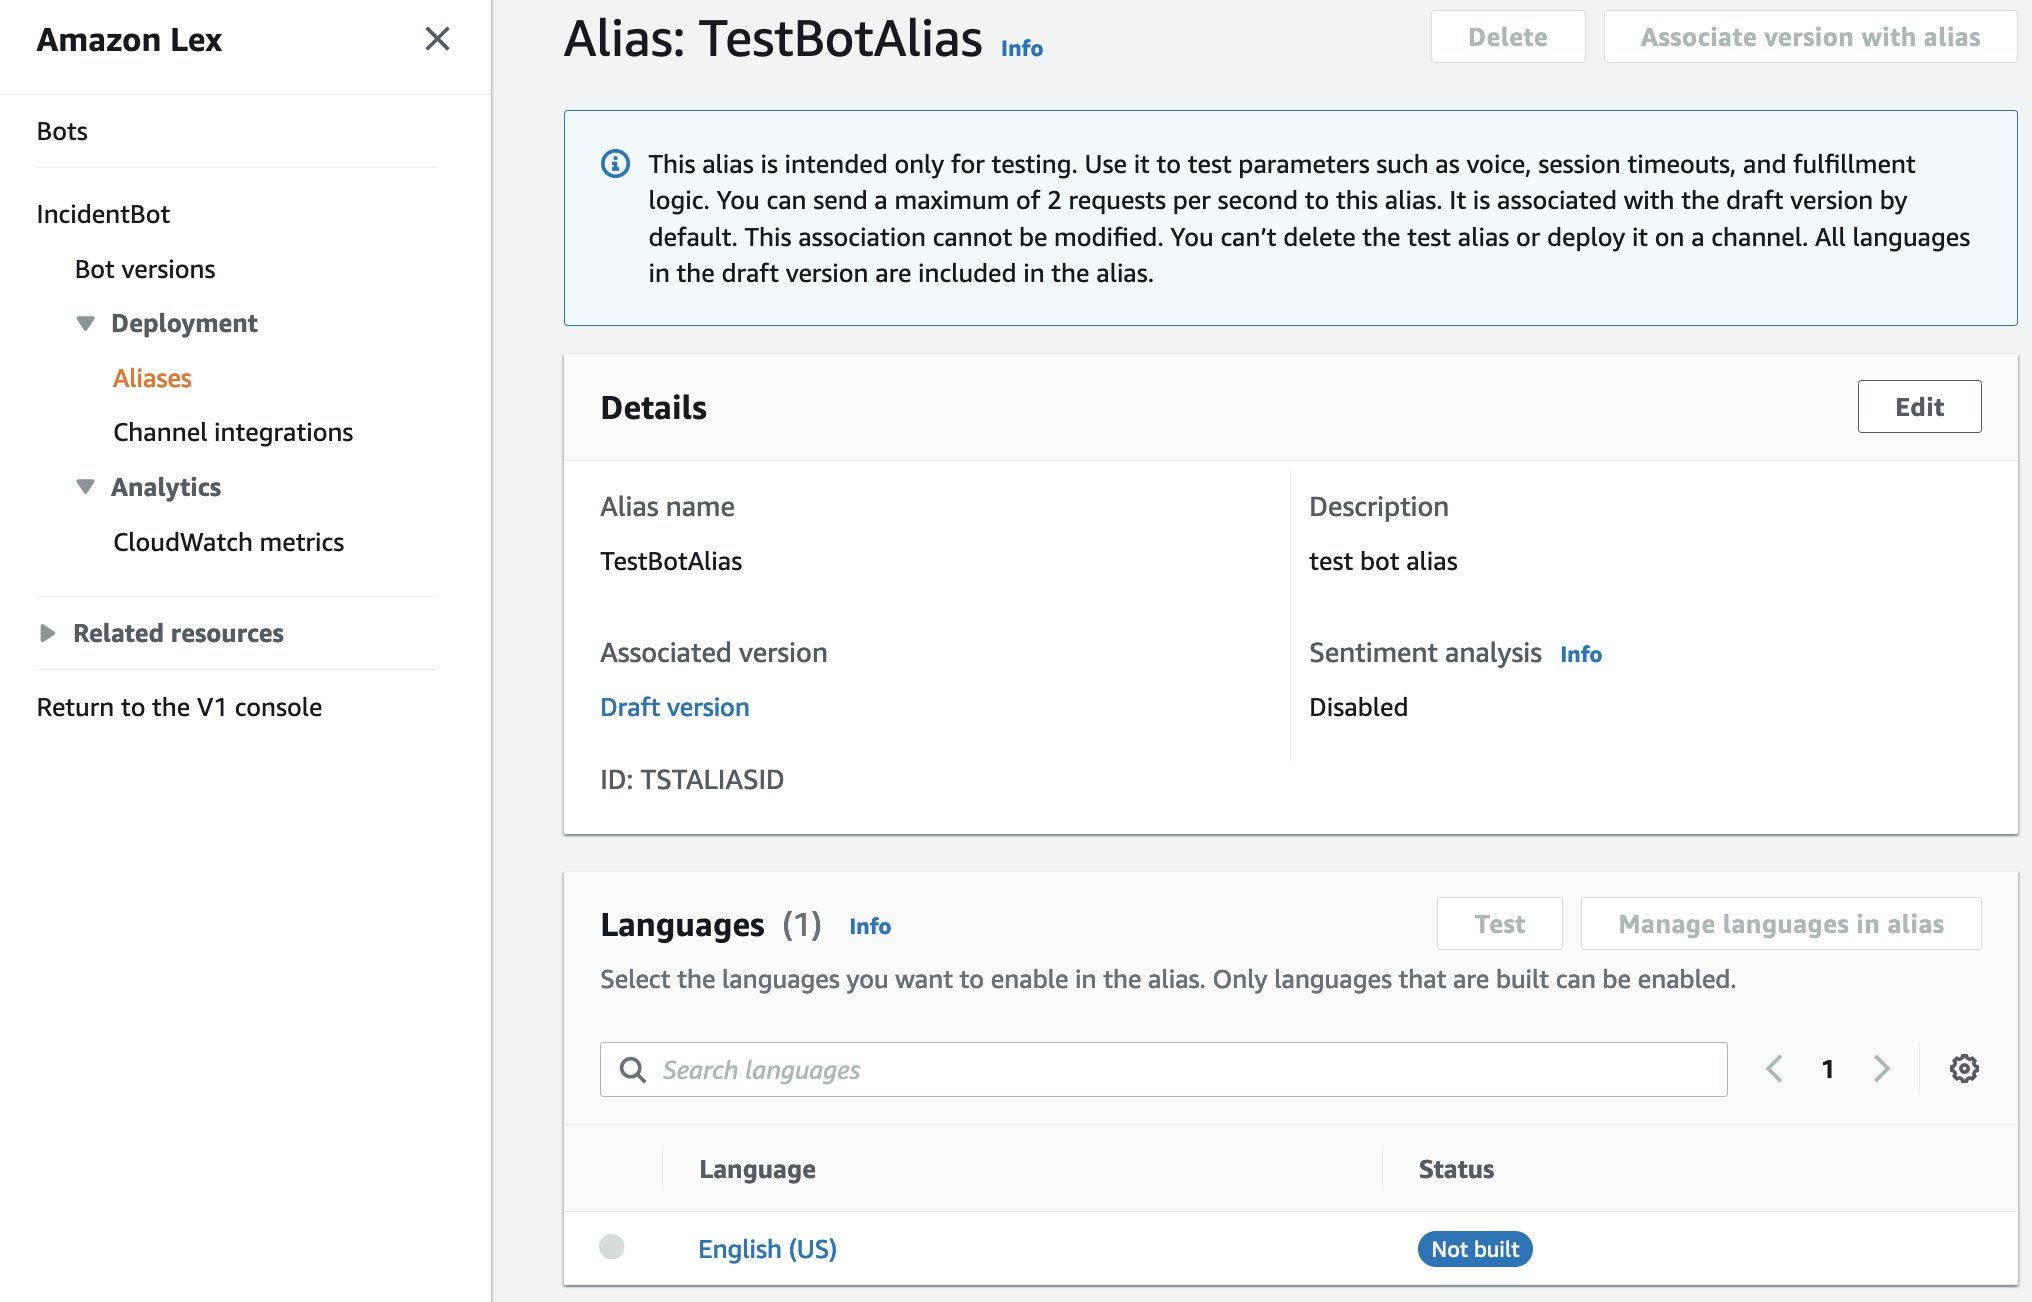
When the bot is available, choose Aliases in the navigation pane to see the alias created for this bot.
Choose the alias TestBotAlias to see the alias details.
As shown in the following screenshot, this chatbot just uses the language English (US).
To have an effective conversation, it’s important to understand the sentiment and respond appropriately. In a conversation, a simple acknowledgment when talking to an unhappy user might be helpful, such as, “I am sorry you are having a bad day.”
To achieve such a conversational flow with a bot, you have to detect the sentiment expressed by the user and react appropriately. Previously, you had to build a custom integration by using Amazon Comprehend APIs. As of this writing, you can determine the sentiment natively in Amazon Lex.
You can enable sentiment analysis on the Lex V2 bot by editing the alias.
On the alias details page, choose Edit.
Select Enable sentiment analysis and choose Confirm.
For this post, you analyze the messages that you receive from end-users in order to understand their mood and return the appropriate response, which is governed by the Lambda logic that uses the detected sentiment to change the response text accordingly.
To add the function to the alias, on the alias details page, choose English (US).
For Source, choose ChatBotLamba.
For Lambda function version or alias, chose $LATEST.
Choose Save.
You’re now ready to build the intent.
In the navigation pane, choose Bot versions.
Choose the draft version of your bot to see its details.
Choose Intents in the navigation pane to explore the intents you created.
To build the bot, choose Build.
Test the Amazon Lex bot
We test the following scenarios:
The user sends a message to create a new ServiceNow incident using the example utterance “create an incident ticket with request access to ServiceNow.”
The user retrieves the existing ServiceNow incidents using the utterance “list top 2 incident tickets.”
The user can also show negative sentiment in the message and retrieve the response accordingly using the utterance “what are the top 2 bad incident tickets.”
To test the bot, on the Intents page, choose Test.
As shown in the following screenshot, you created two incident tickets using the following utterances:
create an incident ticket with request access to service now
create an incident ticket with order a new laptop
This creates two tickets in the ServiceNow instance.
Now let’s retrieve the last two tickets using the utterance “list top 2 incident tickets.”
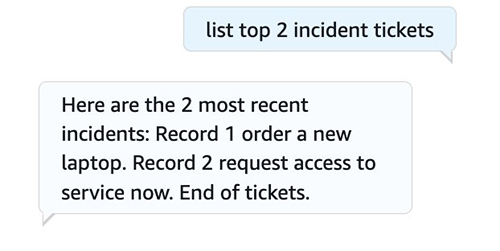
You can test sentiment analysis as shown in the following screenshot, in which the bot responds to a negative sentiment.
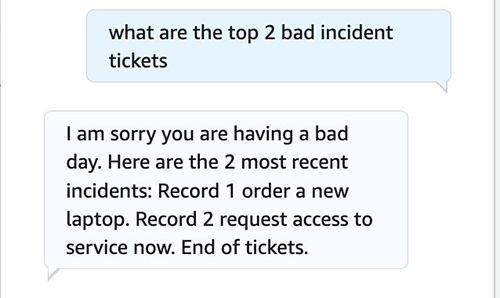
Create a Slack app and integrate Slack with the bot
You can integrate the Amazon Lex bot with various web or mobile applications and client-side codes, in addition to popular platforms like Facebook Messenger, Slack, Kik, and Twilio SMS. For this post, you create a Slack app and integrate your Amazon Lex bot with Slack. For instructions, see Integrating an Amazon Lex Bot with Slack.
An added benefit is that the chabot can determine the sentiment of the user and respond accordingly. The real-time sentiment analysis gives the supervisors the feedback that they need in an organic and automated way without requiring any separate process for feedback collection. The sentiment analysis can be used by supervisors to track negative sentiment on tickets created by users and can also be used to return the response accordingly from our Lambda function– for example different responses for negative sentiment v/s positive or neutral sentiment.
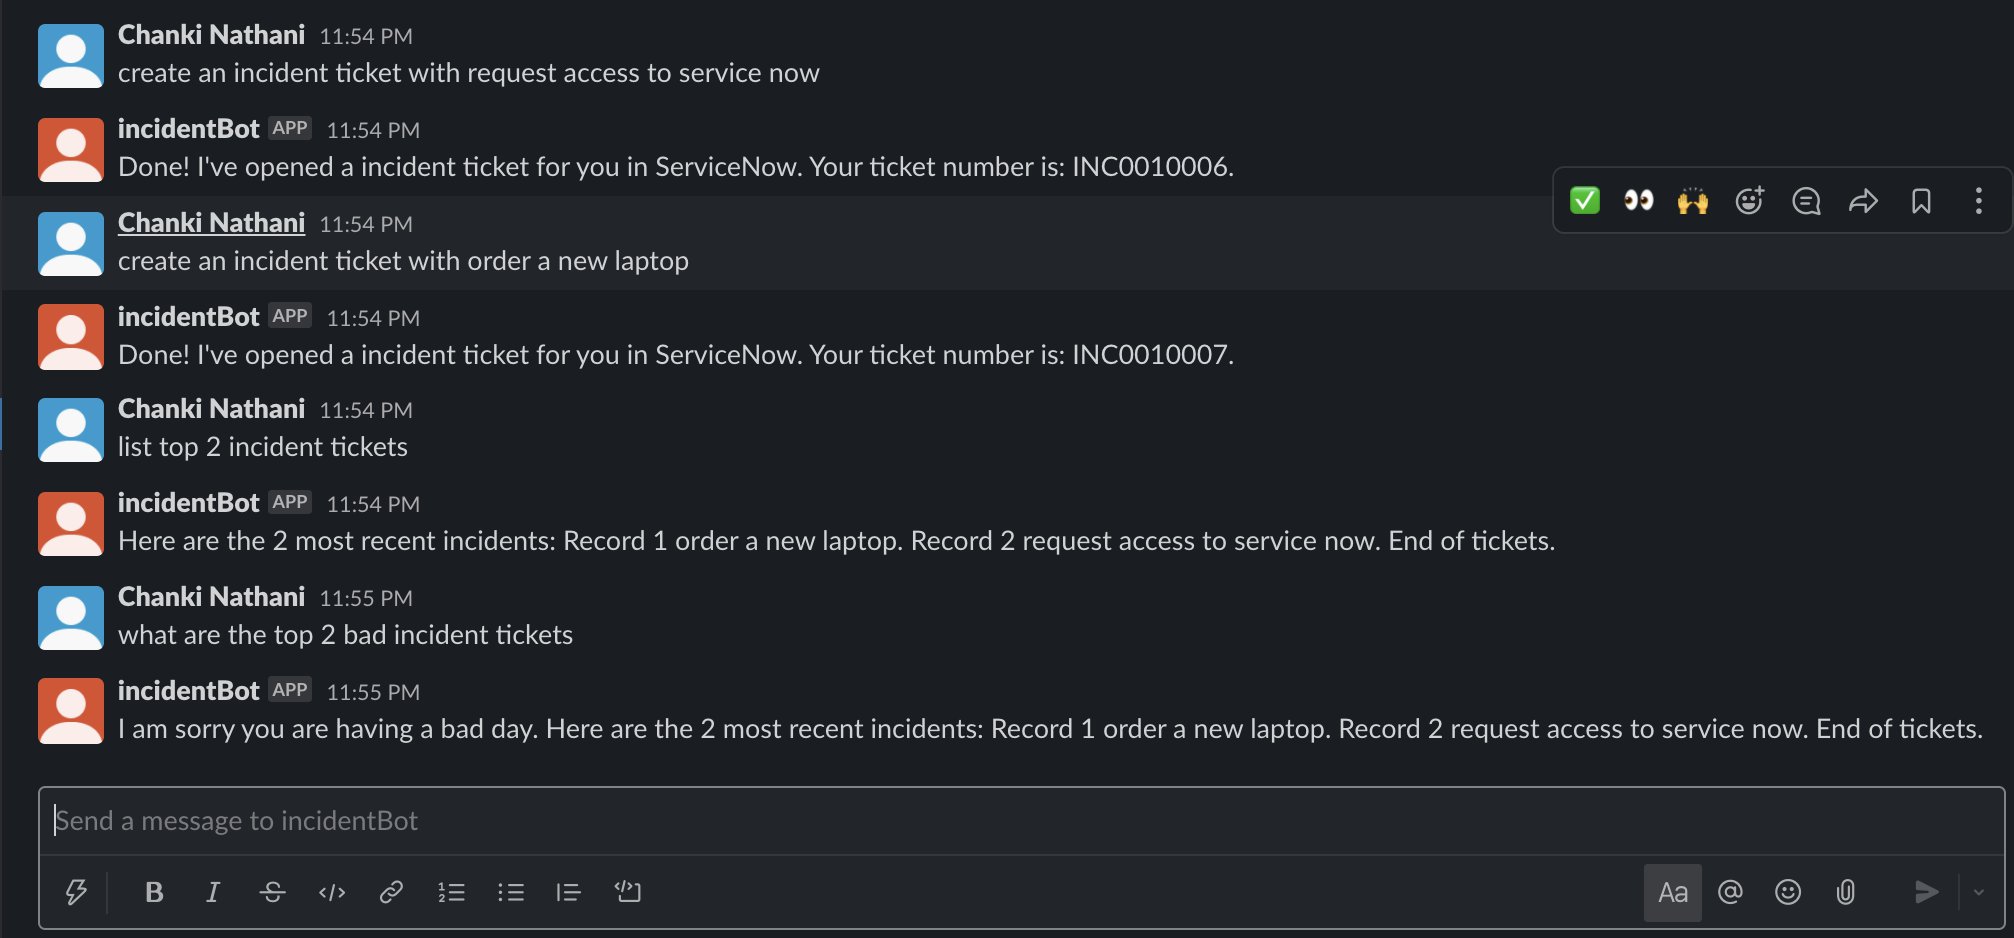
You should now be able to use your Slack app to send messages to the Amazon Lex bot and retrieve the same responses as you tested earlier. The following screenshot shows the same messages tested on the Slack app, with the same results.
Congratulations! You just built an incident bot using Amazon Lex with sentiment analysis that integrates with ServiceNow.
Clean up
To avoid incurring future charges, delete the resources that you created and clean up your account.
You can clean up the AWS environment using the following steps:
On the Lex V2 console, choose Bots in the navigation pane to see a list of all your Lex V2 bots.
Select the bot you created and on the Actions menu, choose Delete.
On the Lambda console, choose Functions in the navigation pane.
Select the function you created and on the Actions menu, choose Delete.
Conclusion
This post showed how you can integrate Amazon Lex bot with ServiceNow incident management and a Slack app. You can integrate the same experience to create and manage tickets as part of your customer support calls. For more information about incorporating these techniques into your bots, see the Lex V2 Developer Guide.
About the Authors
Chanki Nathani is a Cloud Application Architect for AWS Professional Services. As an architect, he supports customers with architecting, designing, automating and building new applications, as well as migrating existing applications to AWS. He is passionate about Cloud and Serverless Technologies. In his spare time, he enjoys traveling and blogging about food from different places.
Vaibhav Chaddha is a Machine Learning Engineer with AWS Professional Services. He spends his time helping customers design and implement solutions using Amazon ML services, to address their business challenges.
Read MoreAWS Machine Learning Blog