

In this post, we demonstrate how to use the Amazon Web Services (AWS) JDBC Driver for MySQL, which allows an application to take advantage of the features of clustered MySQL databases. You can use this driver as a drop-in replacement for the MySQL Connector/J Driver to connect to an Amazon Aurora MySQL-Compatible Edition cluster.
Amazon Aurora is able to provide high availability through the use of failover, but existing client drivers don’t currently take full advantage of this functionality. This is partially due to the time required for the DNS of the new primary DB instance to be fully resolved in order to properly direct the connections. The AWS JDBC Driver for MySQL fully utilizes failover behavior by maintaining a cache of the Aurora cluster topology and each DB instance’s role (Aurora replicas or primary DB instance). This topology is provided via a direct query(by the driver) to the Aurora database, essentially providing a shortcut to bypass the delays caused by DNS resolution. With this knowledge, the AWS JDBC Driver for MySQL can more closely monitor the Aurora DB cluster status so that a connection to the new primary DB instance can be established as fast as possible. Decreasing database failover time can increase your overall application availability.
In this post, we discuss the following topics:
AWS JDBC Driver for MySQL deployment
Failover with the AWS JDBC Driver for MySQL
Failover metrics
AWS JDBC Driver for MySQL deployment
To deploy the AWS JDBC Driver for MySQL, complete the following steps.
You can install the AWS JDBC Driver for MySQL two different ways:
Using the .jar file directly
Through a package manager like Maven or Gradle
In this post, we use a .jar file to connect to the Aurora cluster. The complete installation guide is on the GitHub repo. At the end of this section, we provide more information about using the driver with build automation tools.
After you install the driver, the next step is to create an Aurora cluster.
On the Amazon RDS console, choose Databases in the navigation pane.
Choose Create database.
Leave the default selection for Engine options as Aurora and choose the MySQL 5.7-compatible edition. Version 8.0 also works.
Provide the remaining required information.
Choose Create database.
After the cluster is successfully provisioned, you can select your cluster on the Databases page, and the reader and writer endpoints are displayed as shown in the following screenshot.
When the database is set up and ready, use an open-source database management tool such as DBeaver to connect to your database.
To install DBeaver, see the GitHub repo.
On the DBeaver tool, you can add the AWS JDBC Driver for MySQL.
On the Database menu, choose Driver Manager.
Choose New.
On the Libraries tab, add the .jar file that you downloaded earlier.
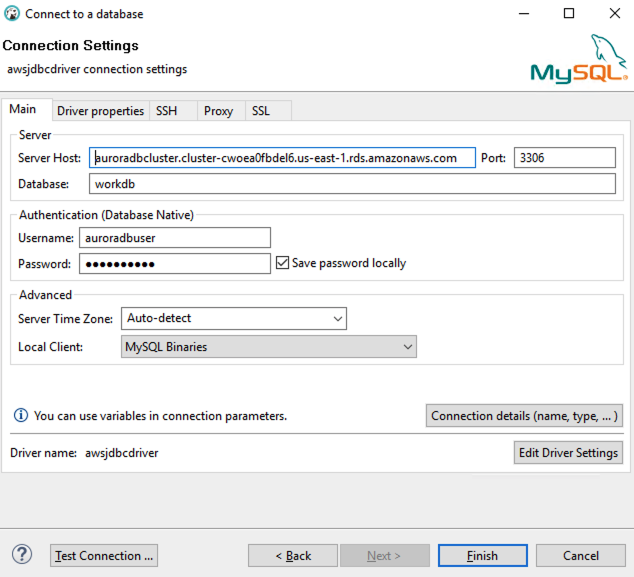
On the Settings tab, add the details as shown in the following screenshot.
Choose OK to save the driver for connecting to the MySQL-compatible Aurora database.
Now you can connect to the Aurora cluster using the driver.
In DBeaver, on the Database menu, choose New Database Connection.
Search for awsjdbcdriver to find the driver that you just created.
Choose Next.
In the Connection Settings pane, for Server Host, enter the Aurora cluster writer.
Under Authentication, enter the user name and password to connect to the Aurora cluster.
Choose Test Connection to make sure there are no connectivity issues.
After a successful connection attempt, choose Ok.
Alternatively, we can use Maven or Gradle’s dependency management to obtain the driver.
For Maven, add the following configuration file to the application’s POM file:
For Gradle, add the following configuration to the application’s build.gradle file:
For the driver name, use software.aws.rds.jdbc.mysql.Driver. For the connection URL, use jdbc:mysql:aws://your-db-endpoint. For the CLASSPATH, use the following code:
Connection plugin manager
The AWS JDBC Driver for MySQL also has a connection plugin manager. The plugin manager allows developers to extend driver functionality in a flexible way, while keeping main driver functionality intact. The connection plugin manager initializes, triggers, and cleans up a chain of connection plugins. Connection plugins are widgets attached to each connection object to help run additional or supplementary logic related to that connection. The Enhanced Failure Monitoring feature is one example of a connection plugin. The following figure shows a simplified workflow of the connection plugin manager.
Whenever the driver runs a JDBC method, it’s passed to the connection plugin manager. From the connection plugin manager, the JDBC method is passed in order to each plugin, and loaded like a chain. In this example, the method is passed first to Custom Plugin A, then to Custom Plugin B, and finally to Default Plugin, which runs the JDBC method and returns the result back through the chain.
Enhanced failover with the AWS JDBC Driver for MySQL
The following figure shows a simplified workflow of Enhanced Failure Monitoring. Enhanced Failure Monitoring is a connection plugin implemented by a monitor thread. The monitor periodically checks the connected database node’s health. If a database node is determined to be unhealthy, the query is retried with a new database node and the monitor is restarted. The Enhanced Failure Monitoring plugin is loaded by default. However, if you’re using Amazon RDS Proxy, enhanced failover isn’t needed, and this scenario is handled by the driver.
A more detailed writeup on failover management is available on the GitHub repo.
Metrics
We used Aurora MySQL 5.7(2.10.0) to benchmark failover times between the AWS JDBC Driver for MySQL and the MariaDB Connector/J (configured to be Aurora aware). A simple Java app connected to the database and issued queries against a table every 1 second. A failover command was then issued to the primary database via the Amazon RDS console. In both cases, the drivers automatically reconnected to the replica, but the AWS JDBC Driver for MySQL recognized failure and reconnected much quicker.
We performed the test with out-of-the-box settings, but it’s important to note that Enhanced Failure Monitoring is highly configurable so you can achieve your desired results.
The metrics in the following table show that the AWS JDBC Driver for MySQL detects failure on average of 2 seconds. It reconnects to the replica and can perform reads in on average 2 seconds of detecting failure, giving a total read downtime of 4 seconds.
MySQL 5.7
AWS JDBC Driver for MySQL
MariaDB Connector/J Driver
Average Client Failure Detection
2 seconds
19 seconds
Average Reconnect Time
2 seconds
18 seconds
Total Reconnect Time
4 seconds
37 seconds
Conclusion
In this post, we discussed using the new AWS JDBC Driver for MySQL with Aurora. We reviewed how to install the driver, described how the driver works, and compared failover times between the AWS JDBC Driver for MySQL and another popular driver (MariaDB Connector/J). We hope you found this information useful.
About the Author
Ryan Shevchik is a Database Specialist Solutions Architect at Amazon Web Services.
Read MoreAWS Database Blog