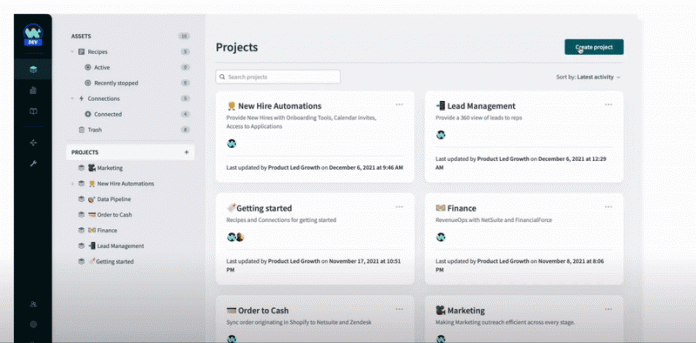
What are Projects in Workato?
When working on your automations, projects are a flexible way to bring together your teams, recipes and applications in Workato, and turn them into shippable automation products.
A project holds the related set of assets for your integration which includes
Recipes
Connections
Folders and Subfolders
Related: Projects Documentation
When to use Projects in Workato?
Let’s say that you are working on an automation that aims to improve how you escalate your high priority support tickets and present them quickly to the engineering team to resolve. To get started on this, you will need:
help from your coworkers
to build the recipe
keep data secure
Creating a project allows your entire team to work together safely and securely in a single workspace while achieving the above.
How to set up a Project:
Step 1: Create and name your Project
We are going to use the same example stated above.
First, create a Project by doing the following:
in the Projects menu, click Create Project
Then, name the Project Ticket Escalation to define the business process that you are automating.
Create a Project and name your Project
Add a description to your project that describes what the automation is about. This step is optional but it is good practice for your team.
Step 2: Invite your team
After creating your Project, you can set up your team with the right access control so you can work together on this project.
Related:
How to invite collaborators to your project
How to use Role-Based Access Control for collaboration governance in Workato
How to set up your team:
Navigate to Team Management > Collaborators
click Invite Collaborator
In this case, your team members are:
Team member 1: Isabelle Koh
Role: Admin of this project
Role Description: Isabelle ensures that the team has access to the necessary application connections, folders, recipes and other assets.
Team member 2: Jane Everest
Role: Recipe Builder
Role Description: Jane will lead the recipe development and building. She has expertise with Workato and is familiar with the business process, rules and logic. As a recipe builder, Jane will have access to create, edit and run recipes
Jane’s access control
Team member 2: Ryan Kan
Role: SDK Developer
Role Description: Using Workato’s Connector SDK, Ryan will be building custom connectors with relevant third-party apps for this project
Ryan’s access control
As you develop your automation, the assets in your project will grow to include more app connections and recipes. In this case, you may create folders and sub-folders to organize your assets.
Assets in your Project: connections and recipes
Step 3: Deploying Changes
As changes and enhancements are added to your automation, your team can easily move all related and dependent recipes and connections to different environments (DEV, TEST, PROD).
Also read: Environments — Democratizing change management for automations
For example, when the recipe is ready for testing, you can deploy it from the DEV to the TEST environment.
Note: To deploy a project to an environment, you’ll need a Workato account with the Environments feature enabled.
Deploying project across different environments
Selecting an environment for deployment
Best Practices for using Projects
Projects are a great way to organize your integrations. As a guideline, you should organize projects in your workspace by:
department
use case
project
Learn More
To learn more about Projects, read the full documentation on Project here.
The post Your Ultimate Guide to Projects in Workato appeared first on Workato Product Hub.
Read MoreWorkato Product Hub


